Showing posts with label wash n' go. Show all posts

Monday, December 22, 2014

How I use a Blowdryer and Diffuser on my Wash and Go


www.curlyincolorado.com how to use a blowdryer diffuser on wash and go
During the winter months I tend to shy away from wearing the wash and go style.  This is because I don't want to walk around with wet hair while it's cold outside.  Recently I discovered that, if I carefully wrap my hair at night, I can rock the curly look without re-wetting my hair in the morning.  So as of late, I have been doing the style at night and then blowdrying my hair before going to bed.  That's where my diffuser comes in.

The point of using a diffuser is to dry your hair without causing frizz.  Mine is an attachment for my blowdryer that I picked up at Sally's Beauty Supply for about 10 bucks.  Unfortunately, the attachment broke recently after years of use which I'll be replacing soon.  Nowadays you can find a blowdryer that comes with its own diffuser attachment included.


How I use my Diffuser

www.curlyincolorado.com how to use a blowdryer diffuser on wash and go
Using a diffuser attachement to
blowdry without frizz
www.curlyincolorado.com how to use a blowdryer diffuser on wash and go
Stretching my hair for more hang time
After I finish applying my leave-ins and gel to set my style, I like to let my hair air dry for about an hour.  At this point my ends will start to harden which lets me know that I can manipulate my hair without ruining the style.

 I like to use the diffuser all over but mostly in back where it takes the longest to dry.  Then I'll remove the diffuser attachment and just point the blowdryer at my roots until completely dry.  Sometimes I'll hold the ends of my hair and stretch it while blowing warm air on the section.  This helps give me a little more length in areas that really shrink up.

Using my blowdryer in this way makes it possible for me to continue wearing my curls even when it's cold out.  I can usually keep the look going by just wrapping my hair with a large satin scarf at night.  In the morning I just shake my hair out and fluff.

Monday, December 1, 2014

Scalp Psoriasis and Natural Hair

www.curlyincolorado.com scalp psoriasis natural hairThe fall and winter tends to be the time of year when we hear more about protective styling.  With the colder temperatures and drop in humidity, a lot of naturals will do this in order to protect their tresses.  I admire all of the different styles from braids to twists and pretty up dos.  However, this is usually the time when I really just want to hide my hair from view.  That is because I suffer from scalp psoriasis which tends to last over a long period, beginning in the fall and lasting into the winter.

There is plenty of information online regarding psoriasis.  In my case it shows up on my scalp and skin in small spots that spread out over time.  Years ago, I sought treatment and advice from medical professionals who unfortunately did not help me to understand the condition.  They prescribed steroid creams which led to my worst spell with psoriasis ever.  Later, I found out that psoriasis is an auto immune disease which means the immune system is out of whack somehow.  Since the digestive tract makes up about 70 percent of the immune system, I tend to focus my efforts there.  I do this by eating a diet rich in clean foods and focus on staying hydrated.  I'll explain more on my diet and supplements in another post.

The tricky thing about having scalp psoriasis while having thick, curly, natural hair is that the flaking that develops can be hard to get rid of.  Using oils can reduce the appearance of flakes but can also increase the production of them.  This means I end up cleansing my hair and scalp more often.

I try to stay away from harsh shampoos during this time because the frequent washing is already a lot of manipulation on my hair.  Sulfate based shampoo leaves my hair feeling stripped and can lead to tangling.  When I cleanse my scalp with a sulfate shampoo I try to follow it up with a pH balanced shampoo or an apple cider vinegar rinse.  I'll do this once a week and then use a sulfate free shampoo on other days.  I end up cleansing my hair and scalp up to three times per week in total.

As far as protective styling goes I've found that wearing hats and wigs are the most comfortable for me right now.  I don't have to worry about flakes being visible when I'm out which is a boost for my confidence.  Other times, a wash and go style is my go-to because it is quick and easy.  I also don't worry as much about the frequent washing because I usually refresh the style every two or three days.

Read Here for  How I Clear Up My Psoriasis with Diet and Supplements

Thursday, April 18, 2013

What Has My Hair Been Up To?

Whoa!  Blogging for the first time in a loooong time.  I also took a break from my Youtube channel for a little while but I'm feeling motivated so here I am.  This first post back I thought that maybe I would share pictures of some of the styles I've been rockin' while away from the blog.  I pretty much have been going back and forth between curly and straight.  It has really been a learning experience because I have been forced to really pay attention to my hair and watch for damage.  Yes, the dreaded heat damage that I swore I would do my best to avoid!  Oh well, when it comes down to it I just really enjoy variety and my hair is no exception.


During this time I have rediscovered the Aphogee product line that I used in my Transitioning days.  I've been experimenting with the Leave-in (a spray) and the 2 Minute Reconstructor.  I credit both for helping me to retain my curly texture after each heat use.  Now normally you wouldn't think it necessary to use protein based products on natural hair but in my case, it's essential.  I've seen first hand how heat can do major damage to my curls so the protein just helps to strengthen my hair where it needs it.

I haven't forgotten about my henna though.  I still like to use it for covering my greys but may get back to using it in the form of henna glosses for conditioning.  Overall, I'm pretty happy with where my hair is right now.  I would like to see a little bit more length though so we'll see where it ends up; no hurry.

By the way, I'm posting videos more often on my channel on Youtube called, Mitchellzee so check that out for updates on my hair journey, tips and reviews.  Ciao!

1/2 WIGGIN' IT
WASH N' GO WITH A HUMP


1/2 UP 1/2 DOWN


WASH N' GO WITH BANGS PINNED BACK


STRAIGHT
STRAIGHTENED AGAIN


WASH N' GO (WET HAIR)
SLICKED BACK/ BANDED PONYTAIL


DONUT BUN
CURLY BRAID OUT

Friday, September 21, 2012

My Sort-a Kind-a Curly Girl Method

Earlier this summer I mentioned in one of my YouTube videos that I was not a fan of the Curly Girl method (CG) because it seemed to do a number on my scalp.  I have issues with dry scalp off and on throughout the year.  This year it seemed to really flare up when I started this method because of the constant conditioner only washing.  Well, I'm still dealing with it now but have gone back to wearing my hair curly everyday.

Curls Up-close
I'm not following the CG method exactly but I just don't see the point in wearing stretched styles when I know my scalp needs to be cleansed more often.  However, I did learn a few things from Lorraine Massey's book, Curly Girl, the Handbook


There is one step that I learned from the book which helps immensely with my new daily washing/co-washing routine.  It's called a, "pre-cleanse".  With this step you just apply conditioner or sulfate free shampoo prior to getting in the shower to wash your hair (book version).  I altered this method a little because I prefer to apply loads of cheapie conditioner like Suave's Naturals Coconut (my staple) instead of the amount suggested.  I do this in sections and it really helps me to pull out shed hairs and tangles.  It also elongates my hair which is usually shrunken up into a tight curly fro from the day before.

I'm still using sulfate shampoo and my favorite leave-in conditioner (Paul Mitchell's The Conditioner) which has silicones in the ingredients list.  For this reason I can't say that I'm abiding by the "rules" outlined in the book.  Sulfates and Silicones are big no-no's with this method but I make sure to use Apple Cider Vinegar (ACV) rinses to help resolve any issues there.  Not only does the ACV help remove build-up but it also helps my hair to return back to a normal pH after using the shampoo.  This is important because this leaves my hair more manageable by closing the cuticle layer back down.  It also helps with moisture retention.  I love ACV rinses!

My hair is definitely benefitting from all of the moisture it has been getting.  I have been rockin' wash n' gos for six weeks straight and can't really see myself quitting anytime soon.  I usually do my hair at night so I'm not too worried about having wet hair in the mornings when I head out.  Hopefully I will begin to see tons of growth and length retention in the upcoming months.


Sunday, September 2, 2012

Tips on How to Define Type 4 Curls

My hair wet with product
Sometimes I feel like I should be crowned the Wash n' Go queen by now after all of the products and techniques I've experimented with to achieve the curly look.  Washing my hair and just heading out the door is never the case.  I have curls but they are "type 4" curls.  Yes, I'm talking about the hair typing system.  It's not my favorite way to categorize my hair but hopefully it will give others a way to gage whether my techinques will work for them.

My curls are tight corkscrew coils, lazy "s" shapes and everything in between.  I even have a section that laughs at the idea of curl definition.  Oh and let's not forget about the shrinkage.  I would say mine can be up to 75% but it depends on the day.

In order to get my curls to pop, there are certain things that I must do in order to get the definition I want.  Just so you know, I'm usually looking for hair that will last me a few days without feeling drastically dry and brittle.  I'm still looking for a softer hold solution but at least I've got the curl definition part down.

Here are some things that I have learned when styling my own hair
My hair freshly washed and detangled
using a denman brush.
Dry with no product

1.  Start with clean hair

For some this may mean co-washing; for others, shampoo.  I've noticed that I really do get the best results after cleansing my hair.  Otherwise, I end up with so-so results.

2.  Detangle, detangle, detangle

There are times where I skip this step and I always pay for it.  Not only does this cut help to cut down on the time it takes to apply the products but the hair is also way easier to work with.  Whether you're shingling, raking or combing product through remember to start with detangled hair.

3.  Make sure hair is soaking wet

When my hair begins to dry, all of those pretty little curls go poof!  Any curl defining product out there is really just a way to lock your curls into place.  My hair is at it's curliest when it's dripping wet so I start with that.  When sections begin to dry, I make sure to keep a spray bottle handy so I can wake those curls back up.

4.  Work in small sections

We've all seen the videos where someone takes a quarter size amount of product and applies it to all of their waist length hair and voila; curl definition.  Not for our hair texture!  It's best to keep the sections as small as possible so that each and every little curl can get enough product from root to tip.  Sometimes, big hair is desirable but if you want every curl accounted for, using smaller sections is the way to go.

I get lots of curl definition using product
on wet hair
5.  Smooth those ends

After I have completely raked the product through a section, I always go over my ends, using my fingers, to smooth them out.  This will ensure that the curl lays flatter and discourages those stubborn single strand knots.

6.  Once the products are all in, LEAVE IT ALONE!

This is a biggie.  I've done it myself more times than I can count.  Still, you've got to leave your wet hair be until you've got that, dried "cast" that tells you it's okay to touch your curls.  Even if you choose to diffuse, remember not to handle your hair with your fingers because this will cause lots of unwanted frizz.  Simply tilt your head and let your curls drop into the diffuser so that it can do its' thing.

 I hope these tips will help someone out there.  I sure wish I would have known all of this long ago when I first went natural.  Still, I'm pretty happy with my coily creations and that's all that matters.


Thursday, August 23, 2012

Singin' in the Rain with Gotye at Red Rocks Ampitheatre

Red Rocks Ampitheatre in
Morrison, Colorado
Here in Colorado it is pretty much common knowledge that Red Rocks Ampitheatre is one of the best places to take in a live show.   This week the hubby and I made another trek up the winding ramp that leads to the open air venue surrounded by massive red rocks to see the musician, Gotye.  The weather was not the best but fun was had by all once the show started.

There were two opening acts before the much awaited headliner.  After warming the crowd up with a couple of tunes,  Gotye (a.k.a Wally) remarked, as most singers do, at how the altitude made singing a challenge.  Still,  he managed to hit all the notes in perfect pitch.  The show was full of beat driven tracks such as, "Easy Way Out," and, "Thanks for Your Time."

Prior to the show this week of course I kept thinking, "what am I gonna do with my hair?"  With the venue in mind it was a no brainer.  A Wash n' Go was pretty much my only option because there was the chance it might rain.  I decided this before realizing that I was completely out of my staple styler, Eco Gel.  That's when I remembered that I still had some Kinky Curly Curling Custard (KCCC) I bought a long time ago.  I couldn't remember all of the do's and dont's for using this product so I went online to check which leave-ins it paired well with.  I found a video on YouTube explaining how the Tresemme Naturals conditioner I love so much works as a leave-in under the KCCC.

On the way to the concert rockin' my curly fro-
So excited!
Before applying the products, I co-washed my hair with Suave Naturals in Coconut flavor.  Then, with my hair still dripping wet, I applied the Tresemme conditioner in sections. After that, I used very little of the gel on each of the sections and wet the hair before raking it through.  I noticed some crazy curl definition right away which usually means tons of shrinkage.  This was what I was going for though and was happy with the final result.  The next day (the morning of the concert) I re-wet my hair to reactive the curls.  I ended up with a coily afro that was a lot of fun to wear.


At the concert there was plenty of wind and rain throughout but I didn't have a care in the world because my curly fro held up just fine.  Which left me with plenty of headspace for remembering all the words to, "Heart's a Mess" and "Save Me," my two favorite Gotye songs.


Waiting for the show to begin
Red Rocks all around

Thursday, May 3, 2012

Saying Goodbye to Heat Damage


In the last couple of videos that I posted to YouTube, I discussed my straight, heat damaged bangs and how I styled them so that they would blend in with the rest of my hair.  Shortly after posting those I started a six week Wash n' Go binge and wore my hair curly the whole time.  For a while I was fine with pushing the straight pieces back or braiding the hair into a headband.  During this time I was also reading the Curly Girl Handbook by Lorraine Massey and learning more about my curls and how to work with them.  I kept looking at my damaged hair and wondered, why was I holding on to the straight pieces?

Using small perm rods to camouflage the straight pieces
After much contemplation, I finally decided to break out the shears.  I already knew that I had curly bangs in my future so why not just get on with it?  First, I wet the hair that I sectioned off for the cut.  This made it easier to tell where the textured hair met the straight ends.  Then I placed a long metal clip across that line of demarcation and cut.  I thought that would do it but the straight pieces were still another inch into the length of my bangs so I snipped again.  I was surprised to see a small, one inch section where my hair was just blah; not really curly or straight.  The rest of the bang was curling up the way I expected.  I ended up with a Betty Paige style look which for me was just fine.
AFTER
Short Bangs
BEFORE
Straight Pieces in Front
It's been about a month and a half since the mini chop and I have to say that for the most part, the bangs are fine by me.  The curls are in good shape even after wearing my hair straight a couple of times.  I refuse to use my flat iron on that area because the 400 degree temperature is just too much.  Instead I use my Gold n' Hot Curling Iron which only gets up to 300 at best.  I'm also liking the Paul Mitchell Super Skinny for my heat protectant these days.

I do wish the bangs were a teensy bit longer though so that it would be easier to braid them down into a cute headband.  Of course this is possible with a little help from my Eco Styler gel.  I'm also realizing that I won't be able to slick all of my hair back for awhile.  For now though, I'm just enjoying the new look and loving the curls.
Used a metal clip to section off bangs
Bye Bye Heat Damage
Bangs before cutting a bit more

Check out my post on how I treated my Heat Damaged Hair

Wednesday, April 4, 2012

DIY Eco Styler Gel Custard Recipe


After many months of searching for an alternative to Eco Styler Gel, I finally resigned to the fact that it's the only gel that gives the hold and definition my curls crave.  Still, I always got the dreaded dry, crunchy feeling everytime I used it.  I usually apply a leave-in to my wet hair and seal the moisture in with an oil underneath the gel.  No matter what, I kept getting the same result.  After reading through the book, Curly Girl, by Lorraine Massey, I found out that the crunch or "cast" the gel leaves behind is actually a good thing.  This is when you know your curls have been set into place.  I found this to be true because after air drying, I'm usually able to fluff and style my hair without worrying about losing my curl definition.  The book suggests that you scrunch the hair to remove the crunch but I sometimes kept getting a dry feeling after this step.
I figured out that the combination of an oil and a mositurizer underneath the gel gave me much softer hair.  This however led to applying lots of products one by one.  By the time I reached the front sections of my hair it was dry and not as manageable.  I wanted a way to apply the products quicker so I decided to just whip them all together and came up with a nice custard consistency.  I'm realizing that this is a much easier way to apply my products and my curls love it!  

Here's the recipe I came up with


Eco Styler Gel Custard


6 oz. Argan Oil Eco Styler Gel (or fill a 12 oz container half way)
2 Tblsp. Hollywood Beauty Olive Creme Hairdress for Dry Hair*
1 Tblsp. Castor/Coconut Oil Mix**


Place ingredients in a small container.  Whip together until all ingredients are combined.   The mixture will have a pudding like consistency. 


*You can substitute another moisturizer; one that pairs well with Eco Gel
**I use a 50/50 Castor/Coconut oil mix to seal my hair.  For this recipe I just used 1 Tblsp of my pre-mixed oil.

The Application

After cleansing and conditioning, I apply my leave-in conditioner (currently Paul Mitchell's The Conditioner) to my hair while it's still wet.  Next I section my hair into four sections to keep my hair up while I'm styling.  Within each section I make small parts and apply my Eco Gel Custard.  I use a smoothing and raking motion to help give the curls definition.  I've also started sealing the hair with oil after applying the gel custard for an even softer hold but this is optional.  Then, I let it airdry for about an hour or so before I use a blow dryer on the roots.  You can also plop the hair with a T-Shirt to help with the drying time or just continue to air dry.


Final Thoughts

I'm finding that the mixture also works on my edges when I wear my hair up.  I haven't done a braid-out or twist-out with it yet but it looks like it may give good results.   I'm going to continue to play with the recipe but this version seems to work well on my hair which is a 4a/4b texture.  I've also started using it on my son's curly 3b/3c/4a hair and it is also responding well.  The only thing I noticed is that I'm getting a lot more shrinkage because my curls just love the moisture.  To get more hang time I usually just stretch it by pulling it back at night.


Thursday, September 29, 2011

What My Hair Has Been Up To


I know I haven't been posting very much lately but I wanted to share some of the styles that I have been rockin' the last few weeks.  I have actually been wearing my hair straight a little more which I think is coming to an end this week.  At least until I can get my hands on a flat iron that has a heat dial so I can adjust the temperature setting.  My FHI Technique G2 straightens really well but only has one setting...400+ degrees!  I know that a lot of you are thinking why use heat in the first place?  I know, it can be damaging but, I'm one of those Naturals who likes to use it occasionally.  Anywhoo, enough of the straight talk and on to the pics. . . Enjoy!

Corkscrew Braid Out
at the Denver Art Museum

Flat Twist Up Do
My current favorite during the week
to keep my hair protected

Corkscrew Braid Out
with Satin Scarf Headband
with Eco Styler Gel on my edges
Corkscrew Braid Out
Back View

Straight Hair in August just
before Trim

Wash n' Go at City Park

Monday, July 18, 2011

How I Style My Heat Damaged Hair for a Wash n' Go

A plait in front helps to
blend the straight pieces
with the rest of my curly hair
Even though the majority of my hair is still nice and curly, the front of my hair is practically straight when I wear a wash n' go because of heat damage.  I've been doing lots of braid outs and twist outs to help add texture to that area.  I finally figured out how to blend the straight pieces in with the rest of my hair when I wear my natural curls.  I feel so silly for not figuring it out sooner but hey, better late than never.

Gel of Choice
for my Wash n' Go styles
Basically, I apply product to my hair the way I normally would for a wash n' go.  I use leave-in conditioner on wet hair (usually Suave Coconut Conditioner) and then seal with oil.  Right now I'm lovin' African Royale's Hot Six Oil, which is a Bronner Bros. product.  Then I apply Argan Oil Eco Styler Gel to my hair in medium size sections starting with the back and rake it through.  When I get to the front, heat damaged area, I still apply products in the same way.  Then I take that section and braid it up in one plait.  Sometimes I'll do a two strand twist with a roller on the end.  Since I start my wash n' go's at night, I usually pull the rest of my hair back into a puff and cover my hair with a satin bonnet.  The next day I take down the puff and spritz with my leave-in spray mixture.  Then I shake my hair out to bring the curls back to life.  Lastly, I take down the plait or twist, which is usually a bit damp but is now wavy in texture and blends in better with the rest of my hair. 


The front now blends with the rest of my hair


Wavy bangs are better than straight for this look


Back/Side View

Friday, April 1, 2011

Goody Brand Hair Accessories at the Dollar Store

Rockin' my new headband
from the dollar store
I was recently watching a YouTube video by one of my favorite online naturals, ItsMeMonchhichi, and found out that the Dollar store sometimes carries Goody Hair bling.  Of course, as with everything else, I had to check the Dollar Tree in my 'hood because Colorado can sometimes get passed up on products. 

I was pleasantly surprised to find headbands, ponytail holders and mini clips manufactured by Goody.  I love to look at these in stores like Walmart and Target but can never bring myself to pay $5 or more for headbands.  When I saw some at the dollar store I quickly grabbed them up.  I also grabbed a pack of four mini clips but one of them broke on me.  I still have three left so I'm not too worried; they were $1!  Now I know where to go when I need something to spiff up my puff or wash n' go styles but still want to keep a little money in my pockets.

Thursday, March 10, 2011

The Puff-My New Favorite Style

Wash n' Go Puff Using
Suave Naturals Coconut Conditioner
and Eco Styler (Argan Oil) Gel
I remember looking through tons of photos and videos of natural hairstyles while I was transitioning.  I was always impressed with how big and fluffy natural hair can get. 

Now, nearly two years later (since the BC), I'm finally starting to see some big hair on my own head.  I just recently noticed that I actually have a decent size puff goin' on so it's my go-to style when I want something easy.  I have to be careful though because the headbands I use can be tight at first.  I really wish that I could wear the style everyday but I don't want to lose my edges or cause any breakage. 


Braid-out Pony Puff
Using a Banana Clip

What I find that works is I'll wash my hair (usually at night) and then prep it for a braid-out or wash n' go.  Then, I'll wear it down the following day.  The day after that, if the style is not as cute as the first day, I'll put it up in a puff.  When my hair is stretched from braids and twists, I can usually fit my hair into a banana clip that I place horizontally to make a full pony-puff.  After a wash n' go, I'll just re-wet my hair and then push it back with a headband until it stops (right at the crown).  I'm definitely looking forward to wearing my hair like this during the summertime. It's so easy and keeps my hair off of my shoulders.  I just hope that it will also help me get to APL.  Fingers crossed.

Wednesday, December 8, 2010

Wintertime Wash n' Go

This time of year is always very harsh on my hair and skin due to the dry climate here in Colorado.  I decided to start doing deep conditioning treatments twice a week for added moisture during the winter months.  The wash n' go style is perfect for this because I'm usually done with the style after two or three days.  Plus, I've been reading and watching how other naturals noticed significant growth while wearing the wash n' go because of the more frequent washing.  I tend to believe that a clean healthy scalp is one contributing factor to this but also the introduction of moisture multiple times per week.  Thing is, it's winter in Colorado!  Leaving the house with wet hair is not happenin' right now.  
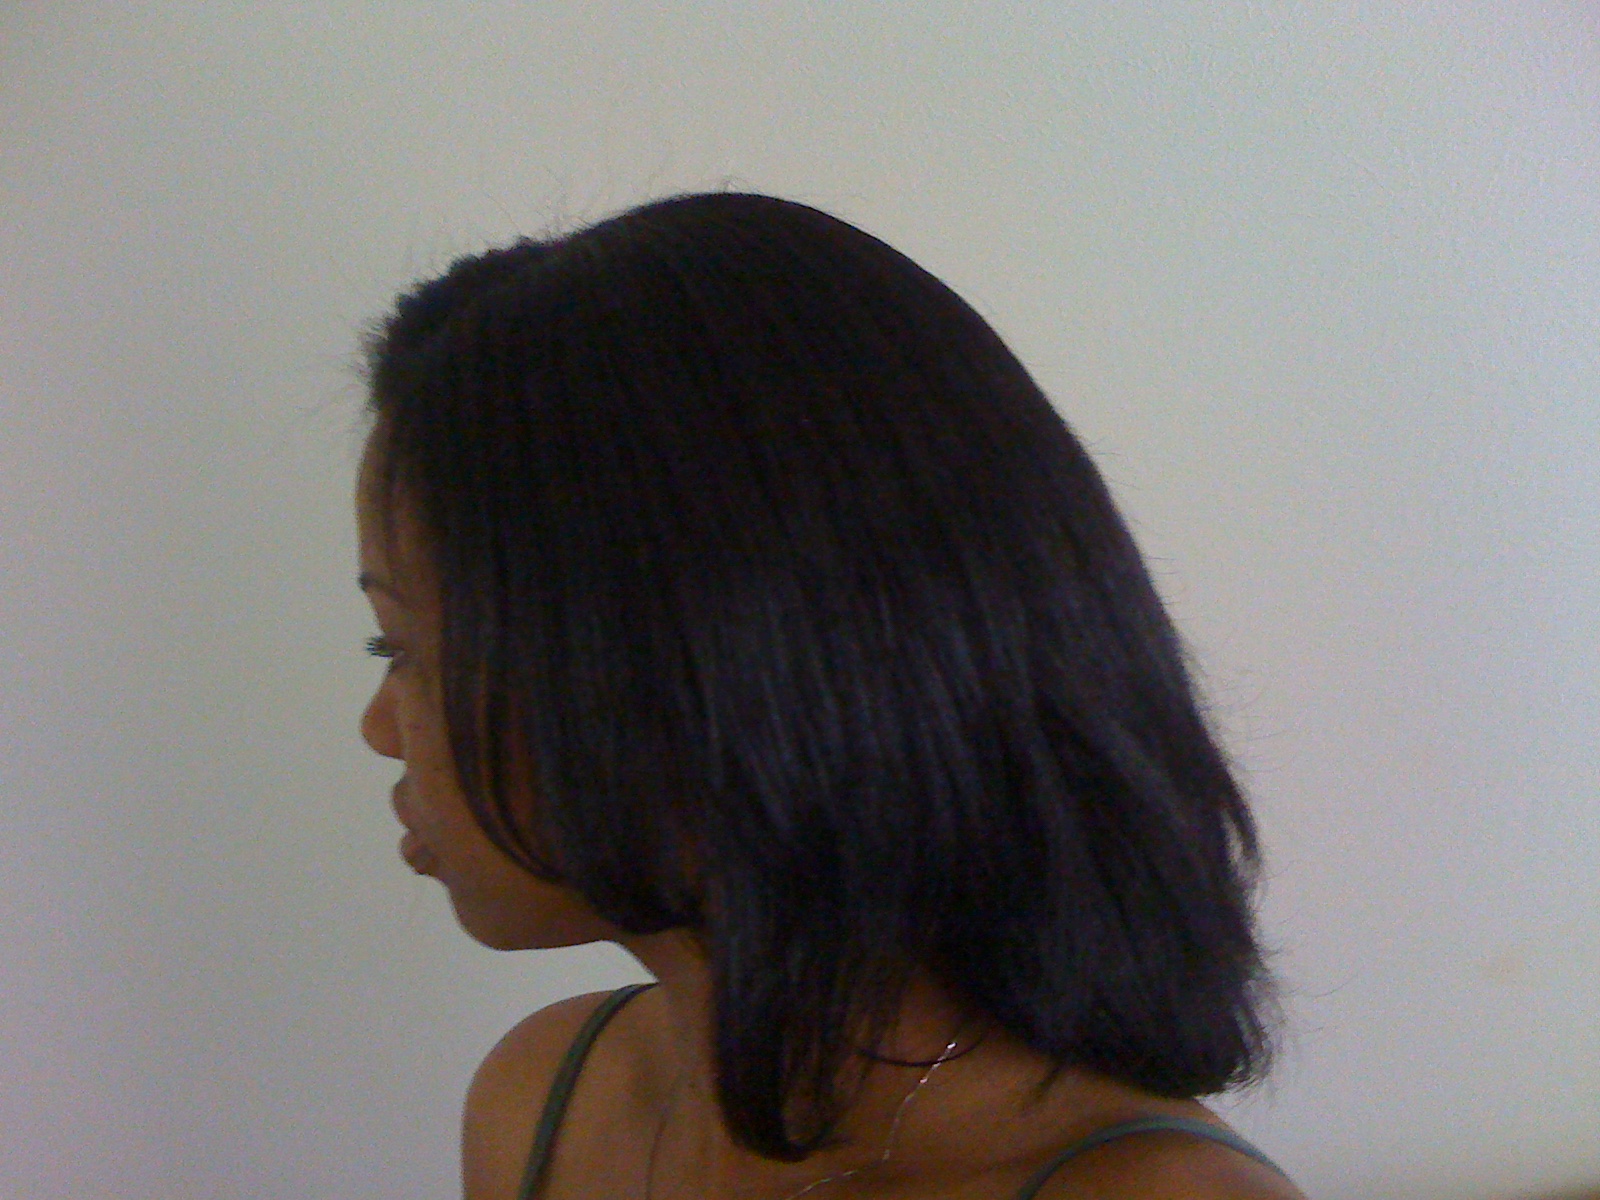
Instead of waiting until the spring to rock my curly fro, I looked at a few videos by one of my favorite naturals, anaturalbeauty3.  She's been natural for 2 years and is currently residing in Cali.  Her video on her night time routine illustrates how she puts her curly hair up at night to stretch it out.  I sent her a message asking how she went about reviving the style in the morning.  She replied back that she scrunches her hair with Shea Moistures' Curl Enhancing Smoothie to wake up the curls.  This was a light bulb moment!  Once I realized that there wasn't any need to leave the house with a dripping wet head I was on it. 

The Curl Enhancing Smoothie product is not available locally so I decided to try my Palmers Coconut Oil Replinishing Hair Milk.  I thought it would work because of it's creamy, but wet texture.  I know it plays well with Eco Styler Gel so it was worth a try. 

After a few attempts, I was able to come up with a routine.  The trick is to apply my usual products for my wash n' go in the evening.  Once it has air dried for a couple of hours, I use the diffuser to get my hair completely dry.  This sets my curls before I wrap it up.  Then, just like in the video, I pull my hair back and secure it with a hair tie.  Any short strands can be pinned down.  I then wrap it with a satin scarf and put on my satin bonnet.  In the morning I just take my hair down, scrunch in some product and that's it.  I'm so glad to have found this method because it has resulted in hair that is soft, moisturized and easy to style.

CLICK HERE To See how I do my wash n' go

Friday, November 12, 2010

Eco Styler Wash n' Go Trials

A few months ago I learned more about Aloe Vera and how it can help restore the natural pH balance of my hair.  This had me wondering what would happen if I added Aloe Vera juice to one of my staple products Eco Styler gel. 

I've been using this gel for my wash n' go styles and whenever I need to slick down my edges.  However, if I forget to apply enough moisturizing products underneath it, my hair ends up a little on the crunchy side.  So, I figured why not add aloe vera and see if that makes a difference since it will help bring the pH of the gel down (hopefully).  I don't have pH tester strips yet so I can't verify what pH I ended up with but the results were good.  The product, as always, helped define my curls.  Upon drying though; dry crunchy hair.  What gives?! 


I've been learning in the past few months that it's not just the pH that is important but also the ingredients.  This little experiment made me realize that it may be the glycerin in the product that always gives me the "Ramen Noodle effect" which is why I always need use oil and conditioner underneath.  Also, living in a dry climate where there is no humidity present can also add to the drying (not moisturizing) effect of the glycerin.  For now, I'm avoiding the Eco Styler or using it sparingly until I can figure out the combination that works for me.


Before applying the aloe/gel mix

My hair with Aloe/ Gel mixture
applied to one section

LinkWithin

Related Posts with Thumbnails