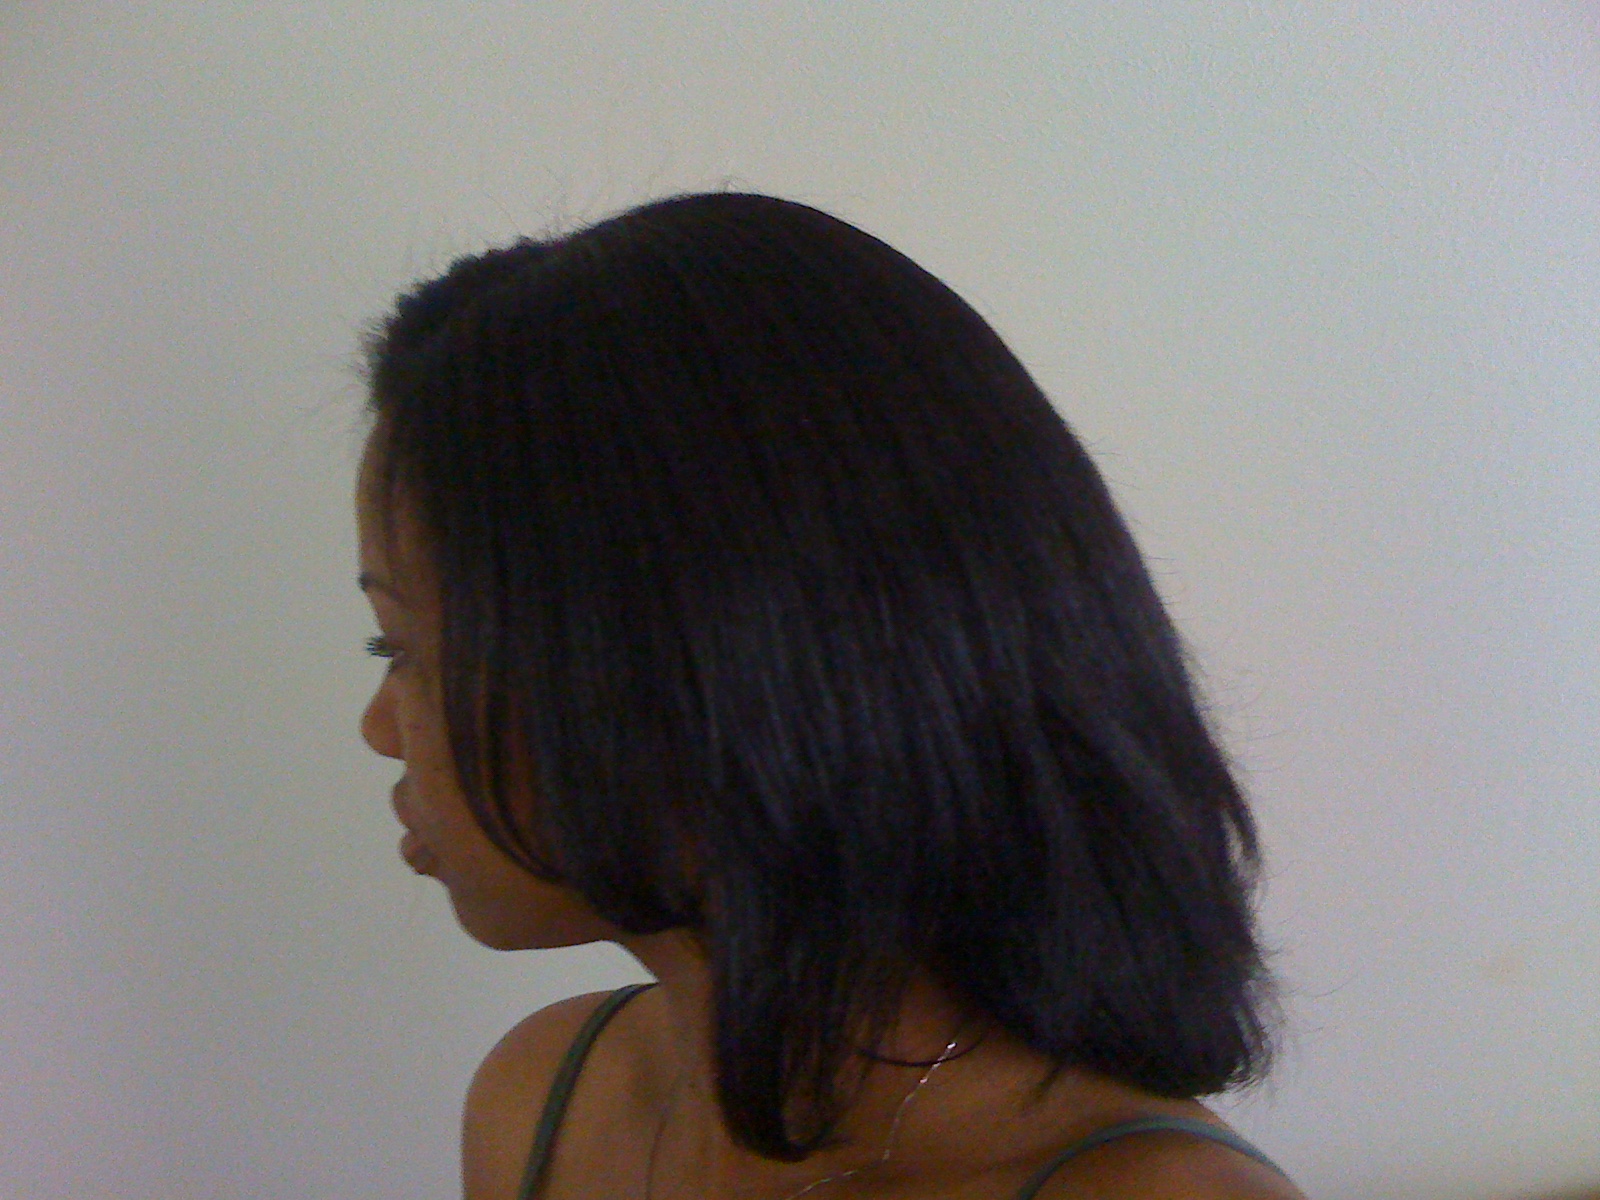
Showing posts with label protective styles. Show all posts

Tuesday, March 3, 2015

Protective Style Challenge and Youtube Channel Updates

www.curlyincolorado.com protective style challenge

Here's my latest Youtube Video where I go over a few updates for my channel and natural hair
journey.  I even speak a little bit about what I'm doing with my hair now for moisture during the colder weather.

WATCH MY LATEST HAIR UPDATE ON YOUTUBE


My Protective Style Challenge 

This weekend I posted a video to help keep all of my viewers up to date on my protective style challenge.  I started wearing my natural hair in protective hair styles in hopes to retain more length this year.  I would like to see my hair at least a few inches longer so I thought putting it away would help speed things up.

One Name to Rule Them All

Last month I took the plunge and renamed my Youtube Channel.  It was something that I was contemplating for some time now.  It feels good to have one name across all of my social media platforms as well.  Just makes things so much easier for me.

Winter Hair Routine and New Products

Lately I have been playing around with a couple of moisturizers to help boost my curly styles.  I'm having great success and mention both in my new video.


Be sure to stop by my Youtube Channel for more hair tutorials and curly hair updates!

Tuesday, January 20, 2015

Protective Style Challenge Week 3: The Puff

www.curlyincolorado.com Protective Style Challenge week 3 The Puff
Keeping my hair up in a puff for this
week's "protective" style
I have decided that in order to keep myself motivated to wear protective hair styles, I'll be wearing one

style per week.  That way I can try different styles while keeping up with my weekly wash routine.  This is my third week on the protective style challenge and I've decided to wear my hair in a puff.  Now, I know what you're thinking, a puff is not technically a protective style.  This is because the ends of my hair are not tucked away or, "protected".  Still, I figure this style will work for me because it will keep me from combing and manipulating my hair.

To style my hair this way I like to use a banana clip placed sideways.  This gives me a much fuller effect than your usual ponytail holder.  I used to cut apart hosiery and use one of the legs for a long wrap around hair tie which also works.  You can watch how I use the banana clip on stretched hair in my Youtube Video.

As far as the products I used, I pretty much followed my usual wash n' go routine.  After cleansing and conditioning my hair, I applied a leave-in conditioner and then grapeseed oil.  Then I added a thick creamy moisturizer to each section of my hair before applying hair gel.  My favorite gel at the moment is Eco Styler gel with Argan Oil.  I realized the order I used to apply my products basically meant I was using the L.O.C. method to moisturize my hair.  That means leave-in, oil and cream; in that order.  I'm curious to see if that will make a difference in how my hair feels
this week.

Next week I may end up doing a ponytail roller set on my hair so that I can experiment with an up-do.  Until then, I'll be wearing the puff with a mid week co-wash to cleanse my scalp and add moisture.  Then back to the puff to ride out the rest of the week.

Friday, January 16, 2015

How I Prep My Natural Hair for My Wig

www.curlyincolorado.com how to prep natural hair for wig
Rocking the Verona Girl Half Wig by Freetress
for my protective style challenge
It's official!  In today's video post I announced my protective style challenge.  Now I'm really on the hook to stick with it over the next couple of months.  I'll also do updates periodically to share about the products and styles I'll be trying so stay tuned to my Youtube channel,"mitchellzee".

I also thought I would share how I get all of my hair flat enough to wear my new half wig.   My hair can be pretty full when dry so my best option is to braid my hair while damp.  I also demonstrate what I used to moisturize my hair which we know from my last post was just okay.  Still, the braiding proved to be a pretty good option for me.  Check out the video to see how I did it and also what I thought of the, "Verona Girl" half wig by Freetress.


WATCH MY VIDEO ON 
HOW I PREP MY NATURAL HAIR
FOR WIG WEARING

Tuesday, January 13, 2015

Keeping My Hair Moisturized While Protective Styling

www.curlyincolorado.com keeping hair moisturized protective styling
It's a wig!
protective styling with
this full cap wig by Freetress
Last week I started a personal protective style challenge.  A protective style is one that protects the ends of your hair by tucking them away.  My personal challenge is to style my hair this way for a few months.  This will be challenging because I prefer to wear my hair down more often than not.  Hopefully this will lead to the length retention I need in order to gain a few more inches this year.  I plan to do this by wearing my hair in up dos and
under wigs.

Right now,  I only have two wigs and plan to purchase a couple more.   I'll also be styling my hair in buns, braids and flat twists when I'm not wearing a wig.  I'm doing all of this to keep myself from manipulating my hair.  I suspect that the constant styling
I'm used to has led to my hair length plateau.  For me, more styling
tends to lead to more trimming.

www.curlyincolorado.com keeping hair moisturized protective styling
The moisturizer that saved the day!
Before braiding my hair up last week, I cleansed my hair and scalp with a sulfate free shampoo.  I towel dried my hair and applied leave-in conditioner and grapeseed oil to seal in the moisture.  I assumed that this would be enough to keep my hair moisturized for at least a couple of days.  I also used Eco Styler hair gel to smooth my edges down.  Lastly, I braided my hair into two dutch braids like the ones in my braiding video.  Then I wore my wig during the day and wrapped my hair up at night for about two days.

I  thought that the products and the fact that my hair was braided meant that my hair would stay moisturized under my wig.  Boy was I wrong!  A couple of days later I took my hair down and my hair was so dry.  I quickly applied some moisturizer and then sealed with the grapeseed oil again.  I braided it back up and hoped for the best.  The next day, I could tell that my hair was feeling softer but I still wanted to give it more moisture.  I ended up cleansing my hair again and conditioning.  I decided to do a wash and go style using a heavy conditioner as my leave-in, moisturizer, oil and then gel.  My hair had so much life!  The moisturizer I think was the key.  My leave-in conditioner was not enough on its own.

www.curlyincolorado.com keeping hair moisturized protective styling
My current combination of products
to keep my hair moisturized while protective styling
After wearing my hair curly for a few days, I decided to try again.  This time, after my cleansing routine, I applied a heavy conditioner as my leave-in, moisturizer and grapeseed oil.  Then I brushed my hair back into a simple bun.

I can tell a huge difference in how my hair feels.  If this combination of products works for me, I will continue to do this throughout my protective style challenge.

Monday, January 5, 2015

New Year, New Hair Goals

www.curlyincolorado.com
Wiggin' It!
Wearing my new everyday
lookby Freetress
I want three more inches!  My hair has been stuck at APL (armpit length) for what seems like forever.  Part of this is due to my frequent trimming to even out my layers and add thickness.  Now that my layers are growing out, I want to concentrate on overall hair growth.

At the end of 2014 I started looking into ways that I could retain more length in the new year. Of course a lot of people with longer hair contend that protective styling is what got them the hair we all lust after.  I for one am not keen on putting my hair away for months at a time.  I love variety and my scalp does not do well under such conditions.  It looks like cleansing my hair multiple times per week is preferred.  So any type of long-term protective styling is out.

I do still want at least three more inches though and I want them this year!  I'm thinking along the lines of protective styling on the go with wigs and half wigs.  I can braid my hair up underneath the wig and no one would be the wiser.  This would also allow for washing and co-washing whenever I need to. 

So far, I only have two wigs and a diy u-part wig which requires that I leave some of my own hair out.  My current wig selection is okay but, I've got my eye on a couple of styles that may be more in line with what I'm craving right now.  I don't want to wear anything too outrageous.  Just something to get me through the next few months while I quietly hide my real hair. 

www.curlyincolorado.com
Same wig with shorter bangs
As far as haircare goes, I plan to keep my hair in good condition by doing deep treatments weekly.  I will probably use things like light protein treatments, moisturizing deep treatments and hot oil treatments.  I have videos for how I do these on my Youtube channel.  I'm also putting away the scissors.  I can't seem to get enough of those blunt cut ends but I've been cutting off all of my progress.  I do like to do a light trim on my ends every three months though so we'll see.  Here's to reaching new lengths in the new year. . . fingers crossed.

Friday, October 3, 2014

My Bali Girl Synthetic Wig by Freetress

www.curlyincolorado.com bali girl synthetic wig by freetress
I'm wearing Bali Girl,
a synthetic wig by Freetress
I had this brilliant idea this summer that I would give protective styling a try.  It's a great way to retain length while rocking a style that keeps your hair up and out of the way.  I like to change things up though so these styles never last for me.  That's why I figured I would just try a wig so that I could wear my own hair whenever I wanted.  Thing is, the Freetress Bali Girl wig I picked up this summer was only my second ever!  The last wig I bought, I wore a couple times and then put it away.

I was pretty excited with this one though because the front of it looked similar to my hair when I wear it straight.  My husband didn't even realize it was a wig until I told him.  Still, I just had to tweak it a bit here and there.  It was longer than I expected and it also had long bangs.  Check out my video to see how I adjusted it.


Update on My Bali Girl Synthetic Full Cap Wig by Freetress


WATCH MY INITIAL REVIEW ON THE BALI GIRL WIG HERE

Friday, September 12, 2014

Getting Too Cold for My Wash n' Go

www.curlyincolorado.com Wash n Go Braid Out

It is nearly the middle of September and I'm already shopping for knit beanies to wear over my hair in the snow.  Welcome to Colorado!  Home of the mild summers and early winters.  This would be fine by me if I wasn't having so much fun with my wash n' go style.  Yes, recently I've been rocking my curls and enjoying my curly afro.  However, last night it was forecast to drop down to good ole thirty two degrees or freezing as I like to call it.   

To prepare for the cold, my family and I quickly harvested our large, unripe tomatoes from our community garden plot.  We hated to do it but we just didn't want to risk losing them.  While standing in the drizzling rain and feeling my fingers go numb, I decided it was time to start wearing braid outs.  The style works for me  during the colder weather because I don't have to revive the look by rewetting my hair in the morning.  Also, my hair will usually lay flat enough for me to wear a warm knit beanie hat over it.  Braid outs for the win!

www.curlyincolorado.com Wash n go braid out
My High Puff
I might be making a warm headband
for when I wear this style during the winter
I like to knit and crochet so I may possibly construct a new hat for myself.  I might even look into making a warm head band for those days when I want to wear a puff or high bun.  Another option would be to head over to Natural Born Hats and order a couple of their satin lined beanies.  Either way, I'm not about that dripping wet hair life when it comes to the colder temps.  Sure, we still may have a couple of sunny days coming up but as for me and my curls, it's braid out season.

BE SURE TO FOLLOW ME ON INSTAGRAM FOR A LOOK AT MY DAILY HAIR ROUTINE

Friday, May 23, 2014

In Review: Satin Lined Military Cap from Natural Born Hats LLC

Recently I was contacted by a company called Natural Born Hats LLC.  When I saw that they
www.curlyincolorado.com satin lined hat review
Finally a satin lined cap that's stylish
and fits over my natural hair
offered satin lined hats at affordable prices, I jumped at the chance to do a review.  Why is a satin lining so important you ask?  Well, for starters, it can help minimize frizz and matting that can occur when wearing a hat without the added lining.  The smooth satin is what comes in contact with your hair which means less friction which in turn minimizes breakage.  That's music to my ears because I'm always concerned about how my hair will fare when wearing a typical hat.  With this I have no worries.

About Natural Born Hats LLC

If you head over to the website, you'll find the story detailing the relationship between the two friends who started the company.  They were both on a hair journey and using satin bonnets and scarves, as we all do, to protect their hair at night.  They, like me, wanted another option that was stylish for wearing out but still had the protective satin inside.

www.curlyincolorado.com satin lined hat review
Satin lining inside


www.curlyincolorado.com satin lined hat review
Military Cap Style 
What I like about their hats is the sound construction and the variety of styles that are available.  I was sent a Military inspired cap but they also carry sun hats, fedoras and lots of fun knit beanies.  The Military caps are produced using a cotton blend.  This is a plus because I'm planning to wear mine when I go on my walks this summer.  The other hats are constructed using materials such as straw plaiting, flax and polyester.  Each comes with a polyester satin lining. The knit beanies are polyester throughout which makes them machine washable but no dryer.  I like that because I'm planning on getting one for my very active 12 year old son.

I know my new hat will get a lot of use this summer.  I'm favoring braid outs lately which means my braids are sometimes not completely dry in the morning.  Now I can just throw on my satin lined cap and head out the door knowing my braids are still protected.  I've tried this before with other hats but was having trouble getting all of the braids to fit.  It even has room enough when my natural hair is in full swang.


www.curlyincolorado.com satin lined hat review
A hat that fits over my braids YAY!
If you're interested in a comfy satin lined hat for yourself, be sure to head over to Natural Born Hats LLC and use Coupon Code:  CURLYCO25 for an extra 25% off

NOTE:  The code will be active for the next 2 weeks and must be entered using all caps.

Monday, April 21, 2014

Thinking About Crochet Braids for a Summer Protective Style

www.curlyincolorado.com crochet braids summer protective styles For a while now I've been watching videos on Youtube that illustrate how to install crochet braids.  At first, I was just curious how the style was done.  The crochet braids that I remember were stringy, pre-braided strands that were attached to the hair with a latch hook tool.

It looks like the technique has come a long way since then.  Now,  people are using all different types of hair textures to create various looks.  This means the style can be worn curly or straight; short or long.  I'm interested in doing this type of style over the summer because it looks like an easy way to protect my growing hair while having the look of a style that is always ready to wear.  It may take me up to two to three hours to complete but can last four to six weeks.

I watched several videos on how to install crochet braids and this one, by MamiTresses, was the best at explaining how it's done.  Enjoy!


Monday, October 14, 2013

Finally on Facebook and Instagram

I know I'm pretty late on this but bear with me.  I started a page on Facebook sometime ago but was never really sure how to keep it separate from all of my other Facebook ongoings.  My friends and family already hear enough about my hair as it is and I didn't want to blast them with it on there too.  So the Facebook page for my blog was born but then it just sat for a while.  Fast forward to this fall, where I've been a lot more productive for some reason and got back to this whole social media thing.

I also decided to start an account on Instagram because I really like photography.  I figured it would be a fun way to update my YouTube subscribers on some of the daily styling I do with my hair.  Since I upgraded to a new phone I thought it was a good time to check it out.  I have since found out that there is a ton of stuff to see on Instagram and I'm having a lot of fun with it.


MY VIDEO INTRODUCING MY SUBSCRIBERS TO MY FACEBOOK & INSTAGRAM

I'll be using the two social media sites to keep everyone up to date on what is going on during my four month No Heat Challenge which will take us into early 2014.  For now I'm just enjoying my new "online life".

Saturday, May 18, 2013

Gearing Up for Summer

Finally here in Colorado we are getting some warmer weather.  That weekly snow storm business was beginning to drive me crazy!  Every time I saw the cold temps coming I cringed at the idea of wearing a Wash n' Go.  Curly hair is great but, wet hair when the weather is cold is not so great.  As a result, I have been wearing my hair either straight or in stretched styles.


HAVANA TWISTS INSPIRATION VIDEO

Now I'm beginning to wonder what style I want to rock for the summer months.  I'm thinking about maybe taking on Havana Twists.  These are twists done using Marley Braid hair but much larger (and faster) than mini or medium size twists.  It looks like it may be easy to install but I haven't done my own extensions in ages so who knows what I'll get.

I'm also loving the medium size, "Poetic Justice" type box braids.  I would also be doing these myself but I tried to practice recently with some leftover hair from last time and it didn't go so well.  Until I make up my mind and try to tackle a summer protective style, I'll be either straight or curly depending on what activities my family and I have planned.  Since the warm weather is late here I'd better hurry up and decide before it's too late!


BEAUTIFUL BOX BRAIDS INSPIRATION VIDEO

Sunday, January 29, 2012

Protecting Your Hair at Night

Satin Bonnet
for when I'm wearing rollers and
curly braid outs
I've been writing lately about Protective Hairstyles which can help with length retention.  Yet another way to protect the hair is by wrapping it up at night.  This may sound like a no brainer to some but there is a lot of benefit for the hair by doing this one thing.   This practice can be a huge help when trying to reach your hair length goals.

I  recently re-read a bit of Wanakee Pugh's "Practical Guide to Haircare" and something stood out to me.  She stated that even if your hair is too short to be pulled back into a protective style, you can still benefit from wrapping your hair at night.  This reminded me of the beginning of my Natural Hair journey because I did this faithfully every night.  My hair was maybe only 1 1/2 inches long at the time but I kept it wrapped up in my satin scarves when I went to sleep.  Now that my hair is longer I can tell a huge difference in my hair when I go to bed without covering it up.  I wake up to tangles and sometimes dryness.  I agree that it is not the cutest look going but it works.

I mentioned my satin scarves (I have a nice little collection) but you can also use a satin bonnet.  Satin is a man made material that is easy to wash and can be long lasting.  This is highly recommended as far as material choice because it does not draw moisture away from the hair and is smooth so it won't disturb it very much while you sleep.  When I wear rollers to bed I usually reach for my satin bonnet.  Otherwise, I have scarves in a variety of sizes for when I wear braids, twists and protective styles to bed.  Here's a few pics of how I wrap my hair.

Pineapple for the Corkscrew Braid Out
with my edges protected

Air drying while smoothing my edges 

Large Satin Scarf to protect my
 Roller Set from the rain

Satin Bonnets and Scarves from
the local BSS

Thursday, January 19, 2012

Protective Style: Flat Twist UpDo


I'm finally embracing the idea of protective styling to help me retain more length.  This concept has been so hard for me to grasp because I absolutely love wearing my hair out.  The more time I spend over at K.I.S.S. hair forum the more I see that during the week (Monday thru Friday) there really isn't any need to wear my hair down.  I'm usually shuttling the kids to school, exercising and running errands which does not require a glam look.  Still, when I want to look somewhat put together I just throw my hair up into two large flat twists and I'm good.

Before, I discovered this look I was always wearing two french braids (under hand braiding) or two cornrows (over hand braiding).  Sometimes though I think the braids made me look a little juvenile so for this reason I started wearing the twists
more often.

Flat Twists secured
with a Barret
My process is pretty simple.  I discovered that the flat twists have lots more volume when I allow my hair to air dry first.  Usually after my wash day routine, I apply my leave-ins and just pull my hair back into a braided bun for a whole day until it is mostly dry.  Then I take the hair down so I can apply my moisturizer and seal with grapeseed or olive oil.  After this step, I separate my hair into two large sections, parting down the middle and pin one side up with a clip to keep it out of the way.  I lightly comb out the other side with a wide tooth comb and begin flat twisting from the front of my head all they way to the nape.  I found that the twist looks best when I grab smaller sections for each turn.  After twisting all the way down I let the twist sit for a few minutes because it will gradually loosen a bit and look fuller.  I repeat on the other section.  Once both flat twists have "grown," I take the tail ends and twist them around each other.  I then tuck them at the base of the twists with a bobby pin or barrette.  If I want bangs I just take a small section at the front and do three small two-strand twists.  Then I swoop them and secure the bangs into one of the twists.  If I see any loose points along either twist I just use bobby pins to tighten things up.

I used three small two-strand twists
for a side swooped bang
I enjoy wearing this style because it has the potential to look really glam with a little makeup and some earrings.  This is also an easy style to take down so that I can moisturize and seal my hair whenever it is starting to feel dry.  The best thing is knowing that I'm taking care of my hair by simply keeping it tucked away.

Wednesday, January 11, 2012

Protective Style: The Puff Bun

I am slowly gaining on my third year with natural hair and am finding new ways to style my curls.  I have always known that I simply cannot keep my hands out of my hair so sometimes I have to put it away.  More recently though, I have been trying to keep my hair protected for the majority of the time so that by summer I will get to see lots more growth retention (a.k.a. lots-of-hair).

Before now I kept thinking that the only protective styles in my arsenal were Mini Individual Braids, the Donut Bun and French Braids.  Thankfully I have discovered even more ways to tuck my hair away.  I'll be sharing a few styles in the coming weeks so stay tuned!

First up is what I call the Puff Bun but I have seen others call it the "Cinna-Bun".  Basically, I pull my wet hair up into a puff by using an "Ouchless" headband that I wrap around twice.  I use Eco Styler hair gel to help smooth the sides and nape area.  I push the headband back towards the crown until it stops and then spread the puff out to expose the center.  After that I simply push the hair down towards the base.  I then pin sections of the puff with bobby pins and secure the ends of each section near the band underneath.  In the pictures posted I also left out a little hair in front for fluffy bangs.  I used a small clip to secure the ends of the bangs to make a side swoop.  This can also be done with dry hair that has been stretched from a braid-out or twist-out.

I like this style because I don't have to use any hair gel on the length of my hair for a curly effect because I'll be tucking the hair under anyway.  This also keeps my ends protected which will help me reach my hair length goals.

I used Eco Styler Gel on the sides
and nape

Ends are tucked under with Bobby Pins

Back View
More Protective Styles to Come!

Thursday, September 29, 2011

What My Hair Has Been Up To


I know I haven't been posting very much lately but I wanted to share some of the styles that I have been rockin' the last few weeks.  I have actually been wearing my hair straight a little more which I think is coming to an end this week.  At least until I can get my hands on a flat iron that has a heat dial so I can adjust the temperature setting.  My FHI Technique G2 straightens really well but only has one setting...400+ degrees!  I know that a lot of you are thinking why use heat in the first place?  I know, it can be damaging but, I'm one of those Naturals who likes to use it occasionally.  Anywhoo, enough of the straight talk and on to the pics. . . Enjoy!

Corkscrew Braid Out
at the Denver Art Museum

Flat Twist Up Do
My current favorite during the week
to keep my hair protected

Corkscrew Braid Out
with Satin Scarf Headband
with Eco Styler Gel on my edges
Corkscrew Braid Out
Back View

Straight Hair in August just
before Trim

Wash n' Go at City Park

Thursday, September 1, 2011

Biking with Natural Hair

My Bike Helmet
with Flat Twists Underneath
My family and I love going on outdoor adventures.  This summer we have been doing a lot more bike riding together.  I always make sure that the kids wear their helmets but I haven't really been into wearing mine. 

That was until I noticed nearly every other adult on the bike path wearing theirs.  At the very least they had on a cap for sun protection.  So I decided it was time to get out the old bike helmet.  Never mind the fact that it makes me look like Kazoo from the Flintstones.  Safety first, right?  The only thing I had to figure out though was what to do with my thick, curly hair underneath. 

When I go for a bike ride in the morning, the solution is pretty simple.  My hair is usually in twists or braids from the night before so I just wait until after the bike ride to take my hair down.  This means shuttling the kids to school while wearing a satin scarf on my head but hey, I know I'll be cute later on in the day, so that's alright.  I don't even bother removing the scarf because it protects my hair while under the helmet.  Another option is after a braid out when my hair is more flexible, I can get my hair to "lay down" under the helmet without too much of a fight using bobby pins. 


Flat Twists under Helmet
Back View
 Other times though when my hair is up in a bun or puff, the helmet doesn't really work.  Still, in Colorado you really can't get away without some type of sun protection.  The high elevation here can make for some serious sun exposure so I still like to wear a visor and leave my hair up on top of my head like in the pic below. 

So there you go Natural Hair Queens and Curly Goddesses...now there is no reason not to rock your head gear while on your bike ride.  Be safe and happy riding.
Rockin' the Bun with
My Visor

Wednesday, July 6, 2011

My Protective Hair Styles for Summer

Side Bun
I'm really trying to be patient for APL which has been my hair length goal for a while now.  I'm still an inch away from it which is really frustrating.  I'm guessing it will take another two months before I reach it.  I've decided that in order get to where I want to be, I need to really baby my hair and keep it protected. 

It actually feels good to keep my hair off of my neck on hot days.  I try to wear my hair up in a bun or french braids whenever I can.  Sometimes I also like to throw it up into the occasional puff.  I've even been thinking about wearing some type of half wig or lace front to keep my hair completely under wraps.  That's a new concept for me though so it may be a minute before I jump on that bandwagon.  I wore it down for the 4th of July weekend but now it's back up again.


Side Bun Back view


French Braids

Monday, June 27, 2011

Sale This Week at SamsBeauty.com!

I just found out that the already reasonable shopping on SamsBeauty.com is going to be even better this week with their 4th of July Sale.  Some things are still "Buy 1 Get Free," even though it says Saturday and Sunday only.  I've been browsing through the Synthetic Lace wigs on sale and there is a lot to choose from.  Other items include jewelry, cosmetics, skincare and hair products.  I got the heads up from one of my favorite YouTubers Dezi1016 in a video where she is talking about some of the things that are for sale.  There's even a clearance section.  Check it out!

Click here to see Dezi1016's video

Wednesday, October 6, 2010

Braiding My Own Hair

When I was researching what styles would work best for my transition into Natural hair, I found that wearing braids would be a good choice. Here's the thing...the last time I had my hair in braids was when I was 10 years old. My mother used to braid my hair 1 to 2 times each week. I had never gone to a stylist to have it braided.

I had heard all of the horror stories of people getting their braids done and it hurting so bad the first couple of days. Then there was the cost. I was not interested in spending tons of money to have someone else do them for me. I learned about the "Crown and Glory Technique" at Growafrohairlong.com. There were lots of women who were using this method to grow their hair by wearing it in braids a couple months at a time. Here's the kicker, they were all braiding their own hair with professional results in most cases.


I found a twenty minute video on the site that explained how to do braid extensions yourself. I was amazed to see how easy it was (or at least in the video). It showed everything from how to select the hair to how to finish the ends. The tutorial took all of the mystery out of doing extensions. So, I watched the video a few times and headed to my local bss. I was so confident that I didn't even ask for help from a salesperson.

When I got home, I started prepping the hair, carefully following the instructions in the video. Once the hair was ready I got started on my first few braids. Thank goodness I started in the back. I quickly found out that it would take a bit of practice but I finally got the hang of it. I probably worked for 5 hours that night and then another 3 the next morning (after taking my son to school with an Axel Rose scarf on my head..lol!). When I finished, I was so proud of my hair (and I did it for under $30 bucks!).

Thing is...after two months, I just couldn't take those braids. It was the worst feeling not being able to see my hair. Also, since it was my first time, I was constantly having to re-braid sections after each wash. Sadly, I haven't done them since. Now, when I want a braided style, I just work with my own natural hair which is a lot less work. I still use some of what I learned in the video. I get asked by my subscribers on YouTube how I manage to get them to look so neat in back. I just say, "It's easier than you think," and direct them to the site.

LinkWithin

Related Posts with Thumbnails