Showing posts with label transitioning. Show all posts

Tuesday, November 13, 2012

Jumbo Rake Comb Review


When I was talkin' hair with my mother a couple of months ago she showed me a picture of a comb that she was interested in trying.  She checked out a copy of the book, "The Science of Black Hair" from the library and it listed a "rake" comb as a suggestion for detangling natural hair.  I remembered seeing the comb online (probably in a Youtube video) but didn't exactly know where to track one down.  Recently however, I was at the Big Beauty Supply Store in Aurora, and noticed some for sale.  It was by the Annie brand and was called a "Jumbo Rake Comb".   I figured I would grab it for my mom so she wouldn't have to keep looking for it.  I thought that maybe I would give it a try too and since they were only $1.49 plus tax (USD) I bought two.

Jumbo Rake Comb for only
 $1.49 plus tax!
I didn't really know what to use the comb for because I already felt like I had every comb that I needed.  I decided to use it one night when I was twisting my hair up after wearing it in a wash n' go style.  I was surprised at how well the comb detangled my hair.  It's almost like the front end helped to pull apart the tangles but the spacing toward the back end of the comb allowed my hair to glide right through.  When I saw this I decided to try it the next time I detangled my hair in the shower.

My normal routine for detangling is to do it while my hair is soaking wet and saturated with Tresemme Naturals conditioner.  I usually begin by finger combing my hair first which helps me to remove a lot of the shed hair and tangles before moving onto a comb or my denman brush.  So when I tried the Jumbo Rake comb my hair was already free from any major tangles.  Still, I knew that I would be doing a roller set that night so I needed to make sure my hair was thoroughly detangled beforehand.

My twists
used the rake comb
to detangle

Once again, the comb performed beautifully.  I was really surprised because I didn't expect for it to be any different from my wide tooth comb.  Somehow though having the teeth closer together toward the front and wider in back is what I think makes it a more effective tool for detangling.  It really is able to pick apart at the tangles but the hair glides through.  You'd have to try it to see what I mean.  As for me, I do think that I'll be using this instead of my denman brush because it removed shed hairs but not so many to cause concern.

My Mom's hair sectioned and detangled with
the rake comb
I even tried it a week later when I was straightening my mom's hair.  She is transitioning to natural and has about two inches of new growth.  I applied Paul Mitchell's The Conditioner and a heat protectant to each section of her hair and then detangled with the rake comb.  Her hair was only damp but the comb still did a pretty good job.

I give it a thumbs up and would recommend it to anyone looking for a good comb for detangling.

Tuesday, May 17, 2011

Enjoying Your TWA (Teeny Weeny Afro)

A wash n' go style with Eco Styler Gel
 at 3 months Natural
Sometimes I find people in hair forums who are trying to figure out what to do with their TWA a.k.a. "Teeny Weeny Afro".  Everytime I see this I think to myself, don't they realize how good they've got it?  When I was new to being natural and my hair was shorter than ever, I embraced it.  It was so much fun!  Now don't get me wrong, it took some getting used to.  However, after a nine month transition, it seemed like my hair wasn't short for very long. 

When I think back on it, all I can remember is how easy it was.  My routine was pretty simple.  Each day I either re-wet my hair with my homemade spritz or co-washed it in the shower with a cheapie conditioner.  I didn't really use a lot of products.  I moisturized my hair with leave-in conditioner, my aloe/glycerin/water spray or shea butter.  I tried a few different hair gels and realized that Eco Styler worked the best for making my curls pop.  Other than that, I played around with finger coils, the conditioner only method, and hair accessories.  This was also the time when I started wearing earings more often which turned out to be a great compliment to my short hair. 

Using a large, snap barrett
for something different
My only piece of advice for anyone who is wondering about caring for their short fro is to consider what season you'll be doing the Big Chop.  Why?  Think about it, the only way to work with your newly natural hair will be when it's wet or damp.  So, doing the BC during the winter months is probably not the way to go unless there's no way around it.  This is precisely why I decided to cut the last of my relaxed ends off in May of 2009.  By the fall, I had enough hair to do braid outs, blow-outs, and individual braids.   Other than that, I think you should enjoy your short and sassy TWA.  It's fun and easy to care for.  Ultimately though, for anyone who is going Natural for the long haul, it is also just the beginning.

Wednesday, May 4, 2011

Celebrating 2 Years with Natural Hair

This week marks my two year Natural Hair anniversary.  What does that mean exactly?  Well, it was two years ago this week that I decided to go ahead with the Big Chop and finally let go of the last of my relaxed hair.  Since then, I have tried many different styling techniques and hair products hoping to find what works best for my thick and curly hair texture.  There have been some hits and surely lots of misses but it has been a learning experience all the same. 

The reason for all of my trial error is because I wore my hair straightened by chemical relaxer since age 11.  Before that, my mother styled my hair so the last two years have been my first experience with doing my hair in its' natural state.  Not only that, my hair is beginning to grow past the shorter lengths I am used to which means I'm also learning how to maintain my length. 

So proud of my TWA
in 2009
Still, even after all of the research, hair forums, YouTube videos and my own personal hair trials, I am discovering that I still have a long way to go before I can claim that I have mastered my hair.  My natural hair journey hasn't exactly been easy but it is still something I wish that I had done sooner.  It just makes so much sense to do my hair without all of the extra manipulation that comes with heat styling and chemical processing.  I don't run inside when it rains.  I enjoy my fro and my big hair.  When I get that itch to wear it straight, I can do that too.  I love my natural hair and I can't wait to see where it ends up in the next two years. 

Thursday, March 10, 2011

The Puff-My New Favorite Style

Wash n' Go Puff Using
Suave Naturals Coconut Conditioner
and Eco Styler (Argan Oil) Gel
I remember looking through tons of photos and videos of natural hairstyles while I was transitioning.  I was always impressed with how big and fluffy natural hair can get. 

Now, nearly two years later (since the BC), I'm finally starting to see some big hair on my own head.  I just recently noticed that I actually have a decent size puff goin' on so it's my go-to style when I want something easy.  I have to be careful though because the headbands I use can be tight at first.  I really wish that I could wear the style everyday but I don't want to lose my edges or cause any breakage. 


Braid-out Pony Puff
Using a Banana Clip

What I find that works is I'll wash my hair (usually at night) and then prep it for a braid-out or wash n' go.  Then, I'll wear it down the following day.  The day after that, if the style is not as cute as the first day, I'll put it up in a puff.  When my hair is stretched from braids and twists, I can usually fit my hair into a banana clip that I place horizontally to make a full pony-puff.  After a wash n' go, I'll just re-wet my hair and then push it back with a headband until it stops (right at the crown).  I'm definitely looking forward to wearing my hair like this during the summertime. It's so easy and keeps my hair off of my shoulders.  I just hope that it will also help me get to APL.  Fingers crossed.

Monday, February 7, 2011

I Did My Own Big Chop


My hair after 9 months of Transitioning;
Relaxed ends and lots of new growth
I have been doing my own haircuts and trims ever since I graduated from high school.  Still, I wasn't sure if I could successfully do the "Big Chop" myself.  I transitioned for nine months so it was very easy to see where to make each cut.  I guess I was mostly concerned that I would end up with a fro without the right shape.  I had never worn my hair shorter than ear length so the shape of my hair was going to be pretty important to me. 

For awhile I considered going to my Dad or Brother who are both trained barbers.  I even asked if they would be willing to do it when the time came.  I could tell that my Dad was not going to give me a buzz cut because he's so used to seeing me with longer hair.  My brother however had done the Chop for a few other ladies who were starting their journey so he was up for it.  Before I made my decision though I decided to check out some videos on YouTube to see how other naturalistas got it done.  It seemed to me that having someone do it at a salon meant getting a little more length taken off than I wanted.  This was because of the shaping that was done after the relaxed pieces were cut away.   That's when I decided that I would just do it myself because then I would only have myself to blame if I there were any mishaps.  Anyway, I could always have my brother fix it if it came to that. 
My hair the day after the Big Chop

During my transition, I made it a point to cut off a little each month so that I wouldn't have very much relaxed hair left to part with.  I started out by putting my hair into small sections and cut the first piece right in the front.  No turning back!  My fro was bigger than I expected which was a plus.  The following day, I used some Garnier Fructis Sleek & Shine Leave-in Conditioning Cream, aloe vera gel and shea butter on my wet hair to encourage my first little curls to come into view.  I was so proud of my new hair and how the cut turned out. 

Friday, January 14, 2011

1400 YouTube Subscribers!

Many of my friends and family are amused when I tell them about my YouTube videos.  Most of the time I don't even want them to watch because I feel a little silly.  All I talk about is hair so I figure they won't really get why I do them anyway.  As for my YouTube family, there is still so much I want to share. 

My first video was just to show others how I transitioned from Relaxed to Natural Hair.  I was so happy to see all of the positive comments and decided to do update videos to show my progress.  With each video, I received questions which ended up leading to another episode. 


The first time I saw that I had subscribers on my YouTube channel I was shocked.  I didn't really think that I had much more to offer than any other Natural on YouTube.  This is what sort of kept me going though.  Ever since those first two subbies, I've been posting more and more content on my hair journey.  I checked to see how many I was up to today and saw that I have a little over 1400 subscribers!  I know that there are "Hair Gurus" out there who have waaay more but I am blown away by that number.  These are all people who for one reason or another genuinely would like to see more content from lil' ole me! 

I wish that I could post more often but my dinosaur of a computer is a real drag when it comes to video editing.  Hopefully I'll be able to push out a couple of vids here soon to feed the masses.  In the meantime, I just hope that my place in YouTubia is a help to someone out there who is looking for more information on how to go natural.


CLICK HERE to see my Channel, "mitchellzee", on YouTube

Friday, November 19, 2010

Choosing a Ceramic Flat Iron

My FHI Ceramic Flat Iron
When my first flat iron quit working after only one year of use, I decided that I would definitely look into buying something of better quality the next go 'round.  Little did I know that it would be 7 months before I would finally purchase a new one.  Instead of running out and replacing it right away, I decided to take my time and do some research.  One of the first things I did was start looking into styling options that didn't require the use of heat.  This started me on my Natural Hair journey which meant that the flat iron of my dreams would have to be able to straighten my natural hair texture, kinks and all.

I looked at Consumer Reports on the subject and found tons of info on the different types of flat irons.  There are a lot of heat styling tools that are ceramic now but the real question is, how ceramic are they?  It turns out that my previous joke of a flat iron was only ceramic coated which would explain the $40 USD price tag.  The material started peeling and would catch my hair.  This exposed the metal plates underneath and caused lots of breakage.  However, professional tools that used full ceramic plates were priced way more than I could afford and were very fragile.  One drop and crack goes the flat iron.  I later read that the mid-range variety ($80-$150) used plates that have multiple layers of ceramic coating and sometimes even added tourmaline. 


 It is the tourmaline that helps the iron produce more negative ions.  No, this is not chemistry class folks, we're talkin' hair here!  Apparently the more negative ions the better the heat.  Of course, using direct heat on the hair is never considered a good thing but I found out that there are different types of heat.  This information explained how some flat irons give excellent results and also cause less damage while others burn the hair to a crisp.

Of all the brands out there I finally narrowed it down to the FHI Technique G2.  I found the pink version on sale at Ulta for $79 but still see it at Target for ten dollars more.  It definitely puts my old iron to shame but the sucker gets hot so I have to be extremely careful with it.  I like that it has a beveled edge which makes it really easy to do flips and curls.  If I could do it all over again I would hold out for the FHI Platform which has a dial so you can adjust the heat setting.  Maybe one day...a girl can dream, right?  

**Check out this article for more info on choosing a quality Flat Iron**

Tuesday, October 26, 2010

A Family Affair

My Dad is a licensed barber and has been cutting other people's hair since I was very young. He always did cuts and trims for friends and family. I remember when he used to cut my younger brothers' hair. When they were small he would sit them on top of phone books on a chair in the kitchen.

My mother on the other hand was always very good with braiding hair. She taught me how to french braid my own hair when I was 10 years old. Now that I'm Natural, I'm very grateful for learning this technique.

My younger brother and I took after my dad and learned how to cut hair for our friends. I did it more as a hobby throughout college and to get practice for when I did my own hair. My brother is currently going to school to become a licensed barber. He even participated in a "Barber Cut-Off" earlier this year at a large hairshow in downtown Denver. I am proud to say that he is very skilled at his craft.

Now that I have a family of my own, we do things just like when I was growing up. My husband has long straight hair and my boys have short curly fros. Mine is definitely the thickest of the bunch. Still, I manage to somehow keep up with everyone's individual hair needs. I do all of our trims; curly and straight. My trims are usually once a month. Sometimes I'll even have my mother over for a trim and flat iron. For me, it's just always been this way. When it comes to hair, we like to keep it in the family.

Wednesday, October 6, 2010

Braiding My Own Hair

When I was researching what styles would work best for my transition into Natural hair, I found that wearing braids would be a good choice. Here's the thing...the last time I had my hair in braids was when I was 10 years old. My mother used to braid my hair 1 to 2 times each week. I had never gone to a stylist to have it braided.

I had heard all of the horror stories of people getting their braids done and it hurting so bad the first couple of days. Then there was the cost. I was not interested in spending tons of money to have someone else do them for me. I learned about the "Crown and Glory Technique" at Growafrohairlong.com. There were lots of women who were using this method to grow their hair by wearing it in braids a couple months at a time. Here's the kicker, they were all braiding their own hair with professional results in most cases.


I found a twenty minute video on the site that explained how to do braid extensions yourself. I was amazed to see how easy it was (or at least in the video). It showed everything from how to select the hair to how to finish the ends. The tutorial took all of the mystery out of doing extensions. So, I watched the video a few times and headed to my local bss. I was so confident that I didn't even ask for help from a salesperson.

When I got home, I started prepping the hair, carefully following the instructions in the video. Once the hair was ready I got started on my first few braids. Thank goodness I started in the back. I quickly found out that it would take a bit of practice but I finally got the hang of it. I probably worked for 5 hours that night and then another 3 the next morning (after taking my son to school with an Axel Rose scarf on my head..lol!). When I finished, I was so proud of my hair (and I did it for under $30 bucks!).

Thing is...after two months, I just couldn't take those braids. It was the worst feeling not being able to see my hair. Also, since it was my first time, I was constantly having to re-braid sections after each wash. Sadly, I haven't done them since. Now, when I want a braided style, I just work with my own natural hair which is a lot less work. I still use some of what I learned in the video. I get asked by my subscribers on YouTube how I manage to get them to look so neat in back. I just say, "It's easier than you think," and direct them to the site.

Thursday, September 23, 2010

Natural Style-Flat Twist-Out


While I was transitioning, I learned how to flat twist my hair by watching videos on YouTube.  At first, the technique eluded me and it seemed like I could never get the twists right.  I was always starting each one over and over.  I kept at it and now it is one of my favorite styles.  The only thing I haven't quite figured out is how to get them to dry faster. 

This weekend I decided to do some flat twisting once again for a soft wavy look.  One thing I figured out is that if I twist in rows from the crown and go back towards my nape, I end up with pretty little spirals that fall down around my face. 

Another tip I picked up over at CurlyNikki.com is to secure each flat twist with a bobby pin so that it doesn't unravel.  Sometimes I use rollers on the ends for a Twist n' Curl or just leave the ends out for a faster drying time.  

Thursday, August 12, 2010

My Favorite Transitioning Style

Once I decided to go Natural, I considered how long I should go before doing the Big Chop.  At only 3 months post relaxer, I was certain that I wanted to grow my natural texture out a lot more before this step.  Normally I wore my hair straight but I was beginning to see how damaging all of the heat was.  The next best thing was Rollersetting. 

My Hood Dryer
I personally had never Rollerset my hair before.  I had seen it done in the salon but that was about it.  From what I could see on YouTube, there were a lot of ladies who did it each week instead of using flatirons and blowdryers.  I also kept hearing about how handy it was to have a hooded dryer at home for this style and to do deep treatments.  I figured I would give it a go.

I went to my local Sally's beauty supply and purchased the Ion hooded dryer with multiple heat settings for about $40.  When I got home, my husband thought I had gone mad.  I explained that it was an investment and that I would get a lot of use out of it. 

My Curly Fro
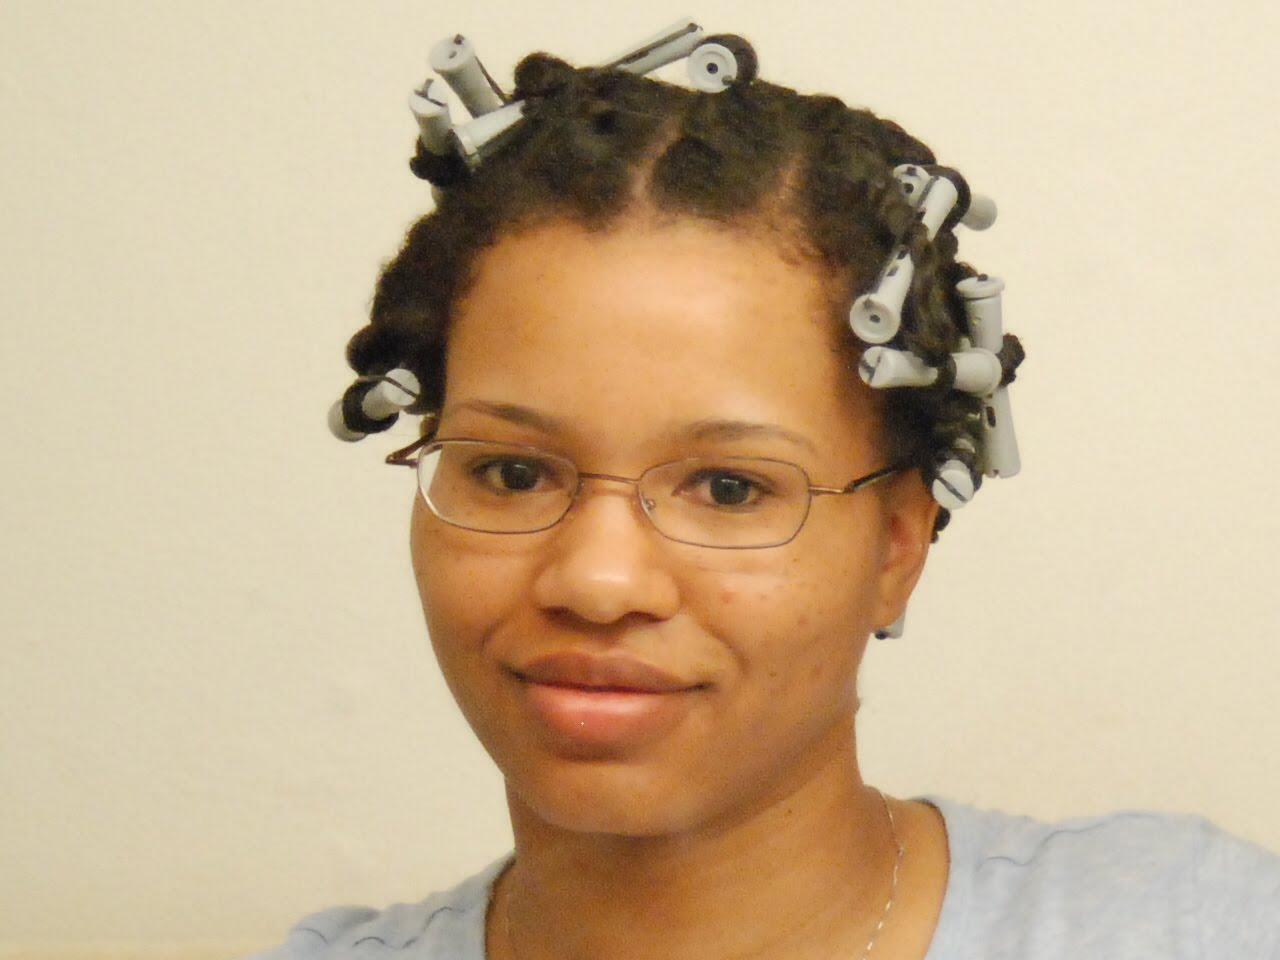
As for the rollersetting, I really didn't know how it would turn out but it was worth a try.  I watched plenty of videos before going for it.  I used the small grey perm rods so that the two textures of my hair would blend together better.  The end result was a cute and curly little afro.  The style often lasted  a whole week which meant less stress on my hair.

It's almost 2 years later and I still rollerset my hair.  I didn't realize it then but it's a technique that can also be used on Natural hair.  I'm glad that I learned how to do it during my transitioning phase because now it's one of my staple styles.

Sunday, August 1, 2010

Transitioning into Natural Hair

Once I finally decided that I was "going natural" and needed to grow out my relaxer, I looked for information on styles that would help with my transition.  The last time I applied relaxer to my hair was in July 2008.  It was now October and my new growth was coming in thick and wavy.  At the time, all I did was wear my hair straight.  This was harder and harder to accomplish the more my natural hair grew.  I looked to the internet and found tons of videos on how to do different styles while transitioning.  I figured why not just start doing my hair as if I were already natural.  That way, I would have some idea of what to do when I cut off the relaxed ends.

Braids with Perm Rods on the ends
Previously, in August '08, I went back to a darker hair color.  With that out of the way, I began focusing on teaching myself how to style my hair without using any heat.  This was all very new for me.  Some styles turned out great and others were complete disasters.  In the months before my "Big Chop", I taught myself how to Flat Twist, Roller set with perm rods and even do my own braid extensions.  Some days I just wore it up in a bun to give my hair a break.  

Now when I look back on my transition, which ended up being for 9 months, I realize that my plan worked.  I use these styles all of the time.  I don't do extenstions anymore, but I enjoy wearing my hair in small individual braids from time to time.  
The "Braid-out" with Satin Scarf Headband

My advice to Transitioners; "Do your hair as if you are already natural,".  Once you decide to go natural, you might as well start your journey and begin using products and techniques that will help you later on.  Not only will you know what to do once you do the Big Chop, but you'll have some idea of how you'll look wearing your
natural hair.

Friday, July 23, 2010

What finally made me decide to go Natural

My hair in Aug. '08
After using a relaxer to straighten my hair for 20 years, there I was trying to decide if I should go Natural.  For me this would mean "re-learning" how to do my hair.  The last time my hair was Natural, my mother was still doing it for me.  I even called to ask her about my hair texture back then.  It wasn't so thick and crazy that she didn't know what to do with it.  I also remembered how long it was. 

Then it was like a light finally went on...my hair was long back then.  I also thought that it was pretty sad that I couldn't even remember what my own hair texture was before the relaxer.  So, that was it, I had my mind set on growing out my relaxed hair.  I figured, I spent twenty years wearing it straight, so why not spend the next twenty natural?

Of course I had to talk it over with my husband.  He and I have known each other since High School and this would be new for both of us.  For weeks I kept asking him if he was okay with it.  Finally he just said, "I didn't marry you for your hair!"  He was behind me 100 percent.  Even now, when I look at how fast it's growing, he keeps saying how he knew all along that it would be healthier if I just quit putting all that harsh stuff in my hair. 

My hair in May 2010
So there you have it.  The last time I used a relaxer was in July of 2008 but I didn't actually decide to go natural until October of the same year.  I waited until May of 2009 to chop off the relaxed ends. 

To watch my video on how I did it, check out my YouTube channel, mitchellzee


Tuesday, July 20, 2010

Stay Relaxed or Go Natural?

So there I was without a flat iron and wondering how on earth I was going to start growing my damaged hair longer.  I was already certain that my hair was suffering because of the lighter hair color I decided to use for two years.  What else was I doing wrong?


I jumped on Google and did a search on growing african american hair longer.  I found a site called "growafrohairlong.com".  I read about how the site's founder, Robin Woods, grew her hair to about waist length by using the "Crown & Glory" method.  She talked about using braids as a protective style to help retain hair growth. She also gave suggestions on how to care for the hair like, how to comb it and deep conditioning.  The thing I remember most was how she explained that she only did a relaxer 2 times per year.  Say whatShe would go 6 whole months without a relaxer!  That seemed like an extremely long time to me considering the longest I went between relaxers was 8-10 weeks.                  

My hair after my 1st pregnancy

Monday, July 19, 2010

Decoder Ring

In my posts I'll be using some hair terminology and abbreviations that are common on other sites and forums.  Here is a brief list for future reference. There may be some additions to the list in the future.

BC/Big Chop--The point when you "chop" off any chemically relaxed ends to finally expose your natural hair texture.

Co-wash (ing)--Using Conditioner to cleanse the hair instead of Shampoo
DT/DC--Deep treatment or Deep condition sometimes done overnight or using a hooded dryer/heating bonnet.

Pre-Poo--Prepping the hair prior to Shampooing using conditioner or natural oils
Search & Destroy--Method used to trim splits or knots from individual strands of hair
SSK--Single Strand Knot; common with natural hair. These usually occur when the hair is worn in naturally curly styles often.
Transitioning--Growing your natural hair out from a chemical relaxer. During this time you will have both natural new growth and relaxed ends.

Henna--Natural hair dye that is derived from the Henna plant. Lawsone is the active ingredient and has a red/orange tint. It attaches itself to the keratin in the hair leaving the it with a permanent reddish tint and added strength.
Indigo--A natural dye that can be combined with Henna to produce shades from brown to jet black.
Cassia--Sometimes called "clear henna" provides conditioning to the hair and will impart a yellowish tone to light hair (leaves no color on dark hair)

Styles
*Braid-Out--Setting the hair overnight using braids for a crimped, wavy look
*Twist-Out--Using two strand twists to set the hair for a wavy/curly look
*Also used to stretch afro textured hair to show more length and fullness
Wash n' Go--A style where the hair is left curly after washing and conditioning. It is common to use Conditioner, gel or other products to help define the curls and
minimize frizz
Roller Set--Using rollers (mesh, magnetic, perm rods) on wet hair and using a hooded dryer to "set" the style. The result; curls with a silky feel that lasts for days.

Hair Length Abbreviations
NL--Neck Length
CL--Collar Bone Length
SL--Shoulder Length
APL--Arm Pit Length
BSL--Bra Strap Length
MBL--Mid Back Length
WL--Waist Length


Welcome to my Blog, Curly in Colorado!

I'm excited to have a new blog where I can share what I know (and am still learning) about Natural Hair.  I have been Natural for over a year now and transitioned for 9 mos before actually doing the Big Chop.

Why I started a Blog
I have a YouTube channel called mitchellzee where I post videos on how I do my own naturally curly/ kinky hair. Editing video is pretty time consuming so I'll be sharing some things here that I may not have time to put into video format.

Upcoming Posts
I really like all things hair and makeup. I plan on doing some product reviews on items that I have discovered that work for me. I'm also a mom...a little bit of a Domestic Diva if you will so I'll also be sharing some of what I've learned over the years raising my three sons (we call them the "Curly Hair Crew").

Stayed tuned for info on hair, beauty, shopping, food, and just plain tips on what I do to make it all work.

LinkWithin

Related Posts with Thumbnails