Showing posts with label braid out. Show all posts

Friday, September 12, 2014

Getting Too Cold for My Wash n' Go

www.curlyincolorado.com Wash n Go Braid Out

It is nearly the middle of September and I'm already shopping for knit beanies to wear over my hair in the snow.  Welcome to Colorado!  Home of the mild summers and early winters.  This would be fine by me if I wasn't having so much fun with my wash n' go style.  Yes, recently I've been rocking my curls and enjoying my curly afro.  However, last night it was forecast to drop down to good ole thirty two degrees or freezing as I like to call it.   

To prepare for the cold, my family and I quickly harvested our large, unripe tomatoes from our community garden plot.  We hated to do it but we just didn't want to risk losing them.  While standing in the drizzling rain and feeling my fingers go numb, I decided it was time to start wearing braid outs.  The style works for me  during the colder weather because I don't have to revive the look by rewetting my hair in the morning.  Also, my hair will usually lay flat enough for me to wear a warm knit beanie hat over it.  Braid outs for the win!

www.curlyincolorado.com Wash n go braid out
My High Puff
I might be making a warm headband
for when I wear this style during the winter
I like to knit and crochet so I may possibly construct a new hat for myself.  I might even look into making a warm head band for those days when I want to wear a puff or high bun.  Another option would be to head over to Natural Born Hats and order a couple of their satin lined beanies.  Either way, I'm not about that dripping wet hair life when it comes to the colder temps.  Sure, we still may have a couple of sunny days coming up but as for me and my curls, it's braid out season.

BE SURE TO FOLLOW ME ON INSTAGRAM FOR A LOOK AT MY DAILY HAIR ROUTINE

Friday, May 23, 2014

In Review: Satin Lined Military Cap from Natural Born Hats LLC

Recently I was contacted by a company called Natural Born Hats LLC.  When I saw that they
www.curlyincolorado.com satin lined hat review
Finally a satin lined cap that's stylish
and fits over my natural hair
offered satin lined hats at affordable prices, I jumped at the chance to do a review.  Why is a satin lining so important you ask?  Well, for starters, it can help minimize frizz and matting that can occur when wearing a hat without the added lining.  The smooth satin is what comes in contact with your hair which means less friction which in turn minimizes breakage.  That's music to my ears because I'm always concerned about how my hair will fare when wearing a typical hat.  With this I have no worries.

About Natural Born Hats LLC

If you head over to the website, you'll find the story detailing the relationship between the two friends who started the company.  They were both on a hair journey and using satin bonnets and scarves, as we all do, to protect their hair at night.  They, like me, wanted another option that was stylish for wearing out but still had the protective satin inside.

www.curlyincolorado.com satin lined hat review
Satin lining inside


www.curlyincolorado.com satin lined hat review
Military Cap Style 
What I like about their hats is the sound construction and the variety of styles that are available.  I was sent a Military inspired cap but they also carry sun hats, fedoras and lots of fun knit beanies.  The Military caps are produced using a cotton blend.  This is a plus because I'm planning to wear mine when I go on my walks this summer.  The other hats are constructed using materials such as straw plaiting, flax and polyester.  Each comes with a polyester satin lining. The knit beanies are polyester throughout which makes them machine washable but no dryer.  I like that because I'm planning on getting one for my very active 12 year old son.

I know my new hat will get a lot of use this summer.  I'm favoring braid outs lately which means my braids are sometimes not completely dry in the morning.  Now I can just throw on my satin lined cap and head out the door knowing my braids are still protected.  I've tried this before with other hats but was having trouble getting all of the braids to fit.  It even has room enough when my natural hair is in full swang.


www.curlyincolorado.com satin lined hat review
A hat that fits over my braids YAY!
If you're interested in a comfy satin lined hat for yourself, be sure to head over to Natural Born Hats LLC and use Coupon Code:  CURLYCO25 for an extra 25% off

NOTE:  The code will be active for the next 2 weeks and must be entered using all caps.

Wednesday, January 29, 2014

Olive Oil Pre-Poo for Dry Hair

www.curlyincolorado.com olive oil pre poo shampoo dry hairJust thought I would share that my hair is making a turn around thanks to my new bestie Extra
Virgin Olive Oil.  This stuff is amazing!  I'm so glad because I was really beginning to worry about where my tresses would end up without some major TLC.  One of the ways I have incorporated the oil is demonstrated in my video below.  I'm learning how important a good pre-poo treatment is if I'm going to continue using shampoo.

I have used mild shampoos and sulfate free versions in the past.  I noticed though that they didn't always remove all of the product from my hair.  Last summer, I was using shampoo all of the time because we were doing lots more swimming.  It all caught up with me and resulted in dryness that my natural hair is not accustomed to.  Also, the dryness that comes with the Colorado winter weather doesn't exactly help either.  So, I'm super excited that the olive oil is working for me.


WATCH HOW I DO A PRE-POO WITH OLIVE OIL

Also, my braid outs have been looking a lot better since I've started using the olive oil.  I first apply leave-in conditioner, which lately is Cantu Shea Butter Leave-in, and then put a little oil on the section. Then I braid it up and finger coil the ends.  My hair is turning out a lot softer using this method because I'm moisturizing the hair from root to tip.  So it's olive oil for the win!  I'll be using this in my regimen for the next few months and post an update on how my hair is doing.

Thursday, December 12, 2013

Using Coconut Oil on Natural Hair in Colder Weather

Coconut Oil for Natural Hair During Winter ww.CurlyinColorado.com
My braid out results using conditioner and coconut oil
I recently picked up one of my favorite hair products, Extra Virgin Coconut Oil.  I probably haven't had any on hand in a little over a year.  This went from being my staple to being something that was just okay.  Somehow I stopped wanting to buy multiple bottles of oils and decided my Grapeseed and Castor oils were all I needed.  Lately though I started to consider the fact that something seemed very different about my hair.  This made me think back to some of the things I did or used at the start of my journey.  That's when I realized that it had been ages since I used coconut oil on my hair.

Coconut oil can have many benefits for the hair.  The one that I was most concerned about was the oil's ability to moisturize the hair.  This is because it's made up of tiny molecules that are small enough to penetrate through the cuticle layer.  I picked some up at my local natural grocery store, Sprouts, without another thought.  It wasn't until I got home that I realized that, in the past, I tried to stay away from coconut oil during the colder months.  Why?  Well, it was because of the fact that the oil had a tendency to solidify at lower temperatures which could lead to hard hair.  This happened to me the first week I started using it again.  I tried it as a sealant after spritzing my hair with leave-in conditioner diluted with plain water.  I did this for a few days in a row before braiding my hair up into two french braids.  When I took my hair down on wash day I noticed that weird, hard feeling.  My ends felt like straw.


After that I figured maybe I would just use it for deep conditioning or hot oil treatments.  Until one night when I decided to use it with my Aussie Moist conditioner for a braid out.  I applied the conditioner to my freshly washed and conditioned hair and then sealed with the coconut oil.  I then took medium sized sections and spritzed with water before smoothing the hair with my denman brush and braided it into plaits.  Let me tell you, my hair was so soft and defined even I couldn't believe the results!  Just two products and I ended up with a braid out that was photoshoot worthy.  That's when I realized that the coconut oil worked for me as long as I used it on wet hair without too much product buildup.   Now my hair is back in love with my old bestie and I plan on keeping up with it during the rest of my No Heat Challenge.  Hopefully this will give me an extra moisture boost during these harsh winter months.  

Wednesday, May 29, 2013

From Wash n' Go to Braid Out

For Memorial Day I decided to wear a wash n' go because it's seemed to be the easy thing to do with my hair.  I had a few errands to run but still managed to fix myself up before heading out.  One of the things I tried was stretching my roots with the blowdryer for the look of more length.  My hair was still damp when I was done so it shrunk up a little.  Still, I was pretty happy with the end result.

Later that evening, I wanted to co-wash my hair and re-style the wash n' go which meant re-applying all of the products and waiting for it to dry.  Instead, I decided to just kick back and watch Youtube while braiding my hair up for a braid out.  I was surprised this morning to see the amount of definition I had.  I was also happy with the look of length I got without having to use any heat this time.

There was already plenty of product in my hair from the wash n' go so I just spritzed each section with a little water before braiding it into plaits.  I then spritzed a little more water on the ends and twisted with my fingers to get a slight curl.  The product in my hair helped with this step.  I didn't even have to use a comb or denman brush.  I just stretched my hair with my fingers and detangled a little here and there.  It was almost too easy!


I'm beginning to see a routine forming here.  I can totally see myself wearing my wash n' go's for a few days and then turning them into braid outs when they start to get a little fuzzy.  I hope this is the case because I get the feeling my hair needs a more simplified routine and this may be it.  What's funny is the fact that this is what I used to do during my first year natural.  Now I'm not sure why I
ever stopped.
Wash n' Go on Memorial Day
Braid out the next day

Thursday, April 18, 2013

What Has My Hair Been Up To?

Whoa!  Blogging for the first time in a loooong time.  I also took a break from my Youtube channel for a little while but I'm feeling motivated so here I am.  This first post back I thought that maybe I would share pictures of some of the styles I've been rockin' while away from the blog.  I pretty much have been going back and forth between curly and straight.  It has really been a learning experience because I have been forced to really pay attention to my hair and watch for damage.  Yes, the dreaded heat damage that I swore I would do my best to avoid!  Oh well, when it comes down to it I just really enjoy variety and my hair is no exception.


During this time I have rediscovered the Aphogee product line that I used in my Transitioning days.  I've been experimenting with the Leave-in (a spray) and the 2 Minute Reconstructor.  I credit both for helping me to retain my curly texture after each heat use.  Now normally you wouldn't think it necessary to use protein based products on natural hair but in my case, it's essential.  I've seen first hand how heat can do major damage to my curls so the protein just helps to strengthen my hair where it needs it.

I haven't forgotten about my henna though.  I still like to use it for covering my greys but may get back to using it in the form of henna glosses for conditioning.  Overall, I'm pretty happy with where my hair is right now.  I would like to see a little bit more length though so we'll see where it ends up; no hurry.

By the way, I'm posting videos more often on my channel on Youtube called, Mitchellzee so check that out for updates on my hair journey, tips and reviews.  Ciao!

1/2 WIGGIN' IT
WASH N' GO WITH A HUMP


1/2 UP 1/2 DOWN


WASH N' GO WITH BANGS PINNED BACK


STRAIGHT
STRAIGHTENED AGAIN


WASH N' GO (WET HAIR)
SLICKED BACK/ BANDED PONYTAIL


DONUT BUN
CURLY BRAID OUT

Friday, June 15, 2012

Braid Out Using Eco Styler Custard

Corkscrew Braidout using
DIY Eco Styler Custard
When I discovered how well my little recipe for Eco Styler Custard worked for my wash n' go, I never really thought of using it any other way.  This was until I recently revisited my Corkscrew Braidout method for an easy no heat style.  That's when I decided it was time to put the custard to the test.

Normally when I do the braidout I start with stretched hair so that I'll have more length and bounce.  This means pulling my hair back and letting it airdry for one whole day before starting the braids.  I just didn't want to be bothered with all that this time so I did the style on damp hair right after I washed, conditioned and detangled.

I pretty much followed the same Corkscrew Braidout method I used in the video (link below).  However, this time I decided to use Paul Mitchell's The Conditioner for my leave-in.  Then I applied the custard to each section of my hair before braiding and curling the ends.  I didn't worry about sealing my hair with oil because the custard mixture already has castor, coconut and grapeseed oil in it.  I also switched to smaller grey perm rods because they give me more of a spiral effect than the medium size rollers.

Check out my YouTube Video for the 


The back
I was really surprised with the results.  My hair was very soft to the touch and moisturized.  I've been wearing the style for three whole days without applying any other products.  I haven't seen any weird product build-up and it still feels pretty soft.  I re-braided a few sections that started to look a little fuzzy at the end of day two.  This was because I just slept on it as is one night.  Otherwise, I've just been pineappling my hair at night to help keep the curls in tact.

Small grey rods to roll the ends vs. the larger pink rods
both from Sally's
I'm really thinking about wearing my hair like this more often.  I get to have the big, curly hair I love while keeping my hair stretched.  The bonus is that my ends stay smooth which means fewer single strand knots.  It's a win, win if you ask me.


3 days later still lots of curls and softness

Wednesday, July 6, 2011

The Cherry Creek Arts Festival 2011

I remember attending the very first Cherry Creek Arts Festival when I was in High School.  I was a budding artist and the concept was so cool to me.  Basically, it's a large scale art event situated right in the middle of the Cherry Creek North shopping district.  There is usually a lot of live music, wine & beer gardens, food and even craft stations for the little ones.  Not only is there lots of cool activities, music and artist booths, but visiting the surrounding shops can be fun too.  Now that I'm older, I enjoy heading to the festival but with the family in tow.  My kids all love to draw so I like to think that maybe the art and artists are an inspiration for them now like the festival was for me when I was younger.  It sounded like a great way to spend my birthday this week which is only 3 days after the 4th of July. 

 Here are a few pictures I took at this years' event.


My Curly Braid out


Lots of good food

Just couldn't resist the Smoked Turky Leg


Festive 4th of July bikes

Friday, December 3, 2010

Rockin' My Fluffy Fro


Early on in my natural hair journey I started trying styles that I could do at night.  I was finally understanding that my hair would thrive if I could just stay away from the flat iron every morning.  Little did I know that there would be a lot of trial and error.  The braid-out style has always kept me guessing because I could never get it quite right.  Either I chose the wrong products, separated the sections too much or it simply wasn't dry in time. 

I've come to realize that every braid-out I do is different depending on so many different factors.  So instead of cringing at the first sign of poof, I'm learning to just go with it.  In the end, the technique is altering my tight, curly fro and stretching my hair.  This helps with tangles and those nasty little single strand knots.  While I am pleased when the style results in lots of definition and curl, I'm also learning to accept the big fluffy look I sometimes
get.  Most importantly, I rock it in public so that others can see that big hair is beautiful and it's here to stay.

Wednesday, December 1, 2010

Braid-out Success with Palmer's Coconut Oil Replenishing Hair Milk

Normally when I do a braid-out I end up with frizzy ends.  I always make sure to be very careful when taking the braids down but it just hasn't been working out.  Another thing that I wrestle with is getting my hair to air dry completely.  I usually spritz my hair with my Aloe Vera juice spray mixture and apply shea butter or some other heavy moisture for hold.  By morning my hair is always damp and we all know what happens if you don't wait until your hair is completely dry...frizzy, puffy hair.  

Now I'm learning to just start out with dry hair and apply moisturizer to set the style.  This is sometimes my current go-to Palmer's Coconut Oil Replenishing Hair Milk, or just plain leave-in conditioner.  I like the Hair Milk because it also helps to reduce frizz and lists shea butter as one of the main ingredients.  I then seal the moisture with one of my favorite oils.  

For my most recent braid-out, I used small satin rollers on the ends.  Only this time I wound the last 2 inches of hair around the roller (like a corkscrew) instead of rolling it up flat like I normally do.  The end result was a fabulous, full style with waves and spiral curls.     

Here are some pics


Most recent with curly ends
My Braid-out before with
straight, frizzy ends


Friday, October 29, 2010

Crochet on the Brain


My "Rasta" Slouchy Beret

I want a hat that is large enough to cover up my braids when I'm trying to do a braid-out. For some reason my hair is never dry by morning when I'm taking the kids to school. Then, when I wear my hair out, the hats that I see at the store are just not big enough for my hair...lol! So, I've decided to make my own. That way I can make it as big as I need to.

Which brings us to the slouchy beret that I've been working on since early September.  I found the beret crochet pattern on YouTube (my second home).  It was posted by Bethintx1 in four seperate videos where she takes you through it step by step.  The color I used (Limelight) is not really something I would wear out but the hat turned out kinda cute anyway.  I did a couple more increase rows to make a "Rasta" style hat.  I'm gonna start the pattern again (the first try was for experimentation) and make a few variations this time. 

Back View
used double
crochet throughout


The yarn I'm using is called, "I Love this Yarn," and is available at Hobby Lobby for about $3.50 (USD) per skein.  I like that it's acrylic for easy washing and is super soft which makes it nice to work with.  It's not only perfect for my budget but it comes in so many fabulous colors.  My second beret is going to be done in the color "Ivory" which will be a fun look for the winter months. 
 

Wednesday, October 27, 2010

The Satin Braid-Out

I joined yet another group over at the K.I.S.S. network. This time it's a group where we will be doing "Satin Braid-Outs" and sharing info on how to perfect the look. I watched a video on YouTube by NinaPruitt where she demonstrates how to do it. I used a long satin scarf that I thought would work and cut it into 4 strips. I cut it using pinking shears because I didn't want the fabric to fray. My hair was freshly washed and conditioned so I applied the KimmayTube Leave-in where I substituted Giovanni Direct Leave-In for my creamy base and coconut oil instead of jojoba oil. Then I sealed in the moisture with my castor, coconut and olive oil mixture.
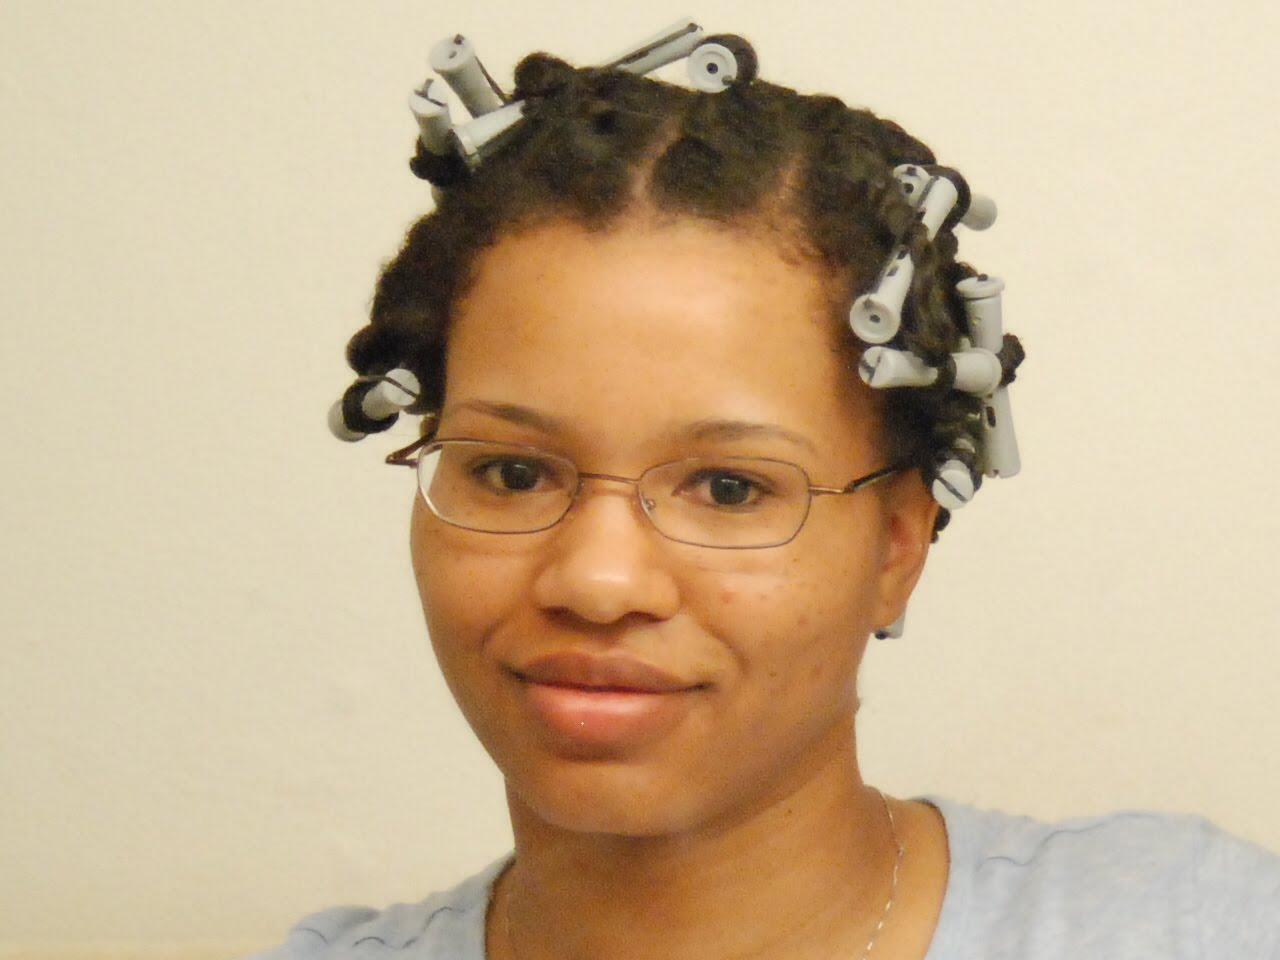
The braiding wasn't as tricky as I expected. It was just like adding extension hair to a braid except you're using a piece of satin fabric. My strips were not quite long enough though so tyeing the ends was a little awkward. The next morning, my hair was very defined but, the strips did leave small pieces of frayed fabric in my hair. I did not enjoy picking those out of my hair all day. Also, my hair was still damp which I knew would lead to crazy, frizzy hair so I put it up into a protective style.
So it's back to the drawing board on this one. I'll have to check back with my group and find out what other ladies are doing for this style. I really hope to get the braid-out down because I know it will come in handy later on.

Sunday, August 1, 2010

Transitioning into Natural Hair

Once I finally decided that I was "going natural" and needed to grow out my relaxer, I looked for information on styles that would help with my transition.  The last time I applied relaxer to my hair was in July 2008.  It was now October and my new growth was coming in thick and wavy.  At the time, all I did was wear my hair straight.  This was harder and harder to accomplish the more my natural hair grew.  I looked to the internet and found tons of videos on how to do different styles while transitioning.  I figured why not just start doing my hair as if I were already natural.  That way, I would have some idea of what to do when I cut off the relaxed ends.

Braids with Perm Rods on the ends
Previously, in August '08, I went back to a darker hair color.  With that out of the way, I began focusing on teaching myself how to style my hair without using any heat.  This was all very new for me.  Some styles turned out great and others were complete disasters.  In the months before my "Big Chop", I taught myself how to Flat Twist, Roller set with perm rods and even do my own braid extensions.  Some days I just wore it up in a bun to give my hair a break.  

Now when I look back on my transition, which ended up being for 9 months, I realize that my plan worked.  I use these styles all of the time.  I don't do extenstions anymore, but I enjoy wearing my hair in small individual braids from time to time.  
The "Braid-out" with Satin Scarf Headband

My advice to Transitioners; "Do your hair as if you are already natural,".  Once you decide to go natural, you might as well start your journey and begin using products and techniques that will help you later on.  Not only will you know what to do once you do the Big Chop, but you'll have some idea of how you'll look wearing your
natural hair.

LinkWithin

Related Posts with Thumbnails