Showing posts with label african american hair. Show all posts

Tuesday, November 12, 2013

Learning How to French Braid Natural Hair

french braiding natural hair
French Braids on my Natural Hair
Recently I posted a Youtube video on how I french braid my natural hair.  I have been wearing my hair braided up more often recently as part of my No Heat Challenge.  It has made things a little easier for me because the weather is cooler these days.  My hair can get really big and full so the french braids make it possible for me to get a hat on my head whenever I want.  I also use the braids to protect my hair while I'm sleeping at night so I won't have to wake up to tangles in the morning.

I posted the video because I wanted to offer a visual to other naturals of how to do french braids.  I see a lot of comments online from people who have never learned how to braid their hair in this way.  I learned the technique from my mother who braided my hair every week when I was younger.  Sometimes she would do a fancy braided style on my hair but later on she just did one or two french braids with a little bang in front.  When I was about ten years old she taught me how to do it on my own hair.  She also taught me how to do the inverted method which was basically the opposite of french braiding.  I was frustrated with it at first because my braids just didn't look as nice and tight as when she did them.  I eventually got the hang of it though.


CHECK OUT MY VIDEO ON HOW I FRENCH BRAID MY NATURAL HAIR

Having this styling technique in my arsenal made it that much easier when I went natural.  When my hair grew past the TWA stage I knew that I could braid my hair up for a braid out or protective style.  I can see now that I'm also saving money because I've never gone to someone else to have them braid it for me.  Hopefully more people will learn the technique so that they'll have more options when styling natural hair.

Thursday, September 29, 2011

What My Hair Has Been Up To


I know I haven't been posting very much lately but I wanted to share some of the styles that I have been rockin' the last few weeks.  I have actually been wearing my hair straight a little more which I think is coming to an end this week.  At least until I can get my hands on a flat iron that has a heat dial so I can adjust the temperature setting.  My FHI Technique G2 straightens really well but only has one setting...400+ degrees!  I know that a lot of you are thinking why use heat in the first place?  I know, it can be damaging but, I'm one of those Naturals who likes to use it occasionally.  Anywhoo, enough of the straight talk and on to the pics. . . Enjoy!

Corkscrew Braid Out
at the Denver Art Museum

Flat Twist Up Do
My current favorite during the week
to keep my hair protected

Corkscrew Braid Out
with Satin Scarf Headband
with Eco Styler Gel on my edges
Corkscrew Braid Out
Back View

Straight Hair in August just
before Trim

Wash n' Go at City Park

Thursday, September 1, 2011

Biking with Natural Hair

My Bike Helmet
with Flat Twists Underneath
My family and I love going on outdoor adventures.  This summer we have been doing a lot more bike riding together.  I always make sure that the kids wear their helmets but I haven't really been into wearing mine. 

That was until I noticed nearly every other adult on the bike path wearing theirs.  At the very least they had on a cap for sun protection.  So I decided it was time to get out the old bike helmet.  Never mind the fact that it makes me look like Kazoo from the Flintstones.  Safety first, right?  The only thing I had to figure out though was what to do with my thick, curly hair underneath. 

When I go for a bike ride in the morning, the solution is pretty simple.  My hair is usually in twists or braids from the night before so I just wait until after the bike ride to take my hair down.  This means shuttling the kids to school while wearing a satin scarf on my head but hey, I know I'll be cute later on in the day, so that's alright.  I don't even bother removing the scarf because it protects my hair while under the helmet.  Another option is after a braid out when my hair is more flexible, I can get my hair to "lay down" under the helmet without too much of a fight using bobby pins. 


Flat Twists under Helmet
Back View
 Other times though when my hair is up in a bun or puff, the helmet doesn't really work.  Still, in Colorado you really can't get away without some type of sun protection.  The high elevation here can make for some serious sun exposure so I still like to wear a visor and leave my hair up on top of my head like in the pic below. 

So there you go Natural Hair Queens and Curly Goddesses...now there is no reason not to rock your head gear while on your bike ride.  Be safe and happy riding.
Rockin' the Bun with
My Visor

Tuesday, August 9, 2011

Semi Permanent Color Over Henna


My Henna'd Hair in the Sun

As you can see from the title, I have finally decided that I'm going to attempt to cover my currently burgundy hair with a Semi-Permanent rinse.  When I started using henna I mixed it with Indigo in order to get a brunette effect.  I was never really successful but continued to use henna each month for the past year or so.  Although, I love the benefits from using henna, I never really intended for my hair to end up so red.  We're talkin' Rhianna type red in the sunlight at this point. 

I've been debating this for a few months now.  Originally I decided that I would just order more indigo and do a two step henna/indigo process.  This is where you apply the henna like normal and after rinsing it completely, apply the indigo for another 30 minutes to an hour and rinse.  The result is Jet black hair and it is permanent.  I know from past efforts that black hair does not look so hot against my skin tone.  Somehow it makes my face look really red and I always have trouble adjusting my makeup palette to suit the black hair color.  Because of this, the darkest I can go is a dark brown. 


For this reason, I decided to go with Clairol's Beautiful Collection in the color Darkest Brown which has a neutral base.  It is a formula that does not contain ammonia or peroxide.  I've read over on NaturalSunshine.ning.com that the Clairol line is pretty much the only one considered gentle enough for Natural hair.  I'm going this route because I figure the color result will be more predictable than trying to mix henna and indigo for the color I want.  The only thing I'm concerned about at this point is the Isopropyl Alcohol which can be drying.  I'm going to make sure and do a moisturizing deep conditioning treatment after rinsing the product and then do an ACV rinse to close down the hair cuticles.  I'll post pictures after the application and do a review.

Wednesday, June 22, 2011

Denver's Natural Hair Meet-Up is Almost Here!

I can't believe that the Denver Natural Hair Meet-up is finally coming up this Saturday, June 25th.  Naturals, transitioners and anyone considering going natural are all welcome to join us for what will be a "Girl's Night Out" style gathering.  We'll talk hair and swap stories while enjoying some great food.  We'll each be paying for our own eats but hopefully we can pick-up a sponsor for future events.

Sabrina of the blog, Seriously Natural, has done a great job talkin' the event up to local stylists who we hope will also be in attendance.  She has even gathered samples of hair goodies from companies like Kinky Curly and Carol's Daughter!  I'm excited too because this will be the first hair meet-up I've been to.  Hope to see you there!


Don't Forget to R.S.V.P.


Friday, June 3, 2011

Heat Damage Again. . .Really?

If you watch my channel, mitchellzee, on YouTube, then you probably already know about the heat damage I have in the front section of my hair.  When I do a wash n' go, I just braid that part up to give it enough texture to blend it with the rest of my hair.  My hair just seems to be really fine in front so even after using 3 different types of heat protection every time I flat iron, I still end up with straight pieces. 

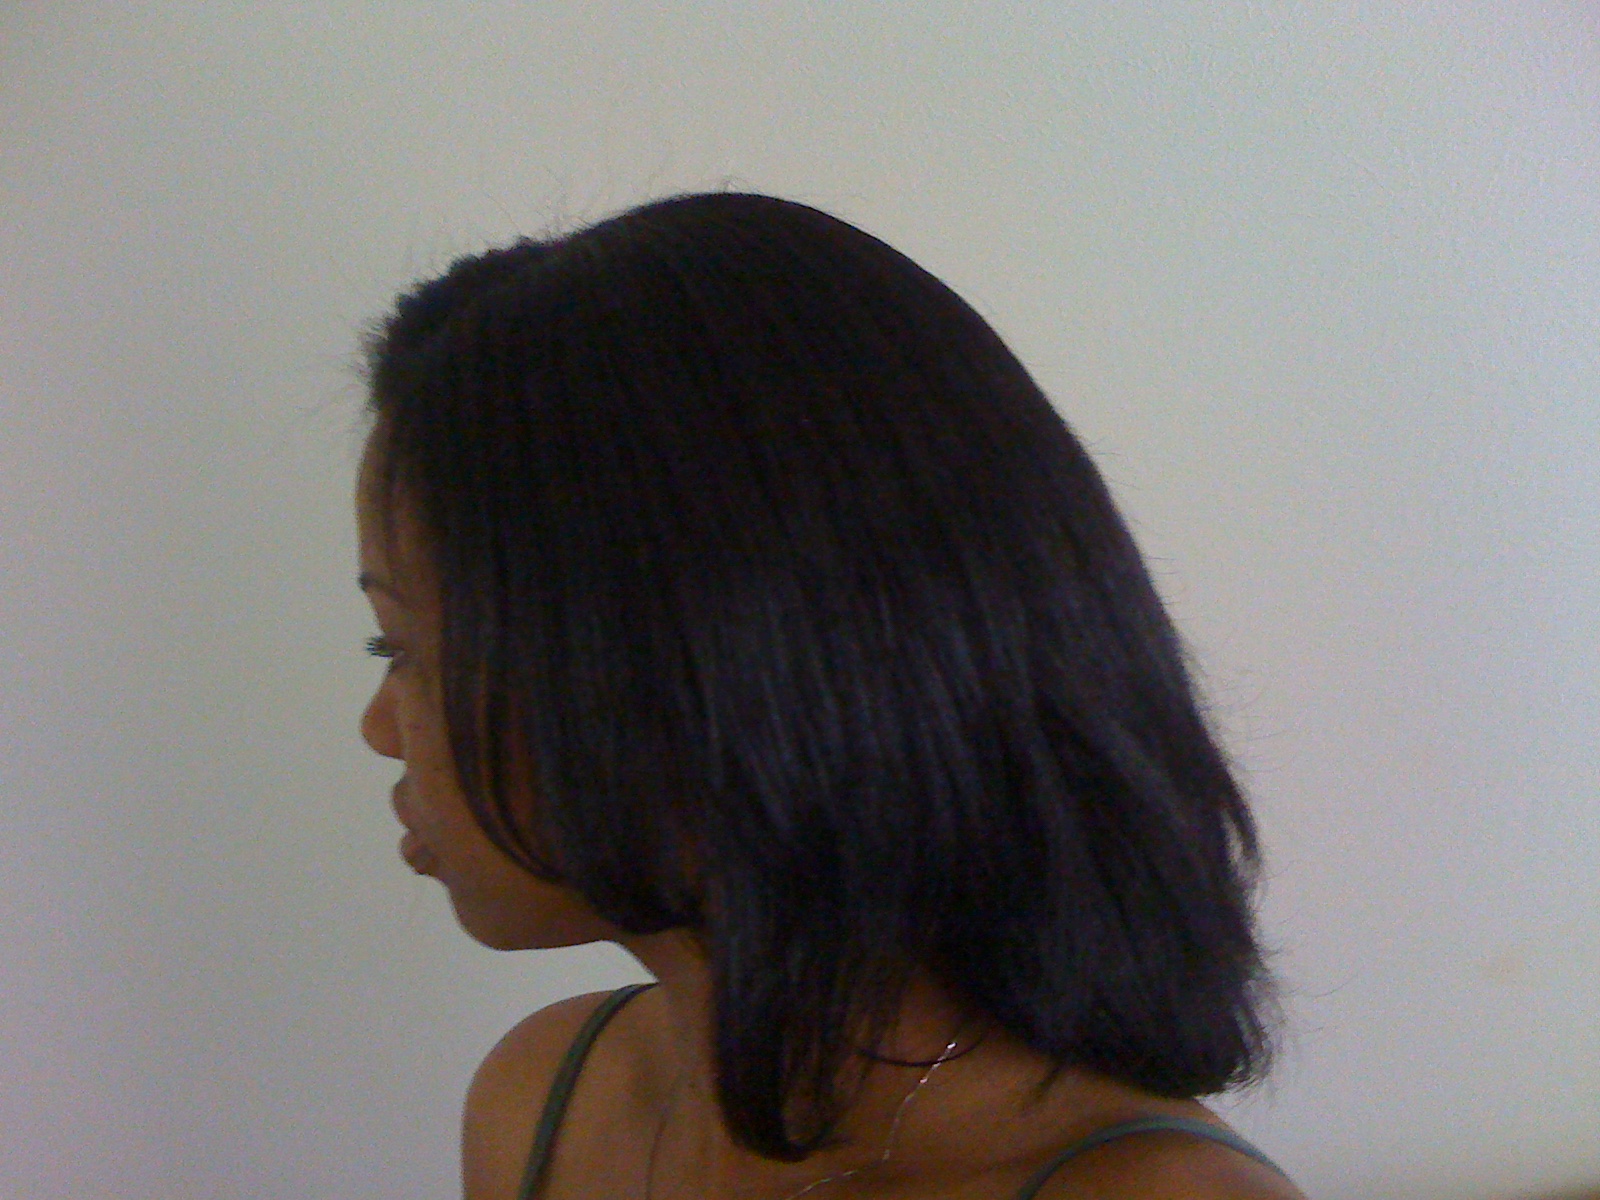
My hair after washing and deep conditioning
No curls; just a mess
So, I was pretty upset when I found even more heat damage after the last time I wore it straight for Easter.  I knew it wasn't the initial press but a touch-up later in the week that did it. 

My rules for avoiding heat damage are as follows:

1.  Always cleanse the hair thouroughly prior to using heat
2.  Do a moisturizing deep conditioning treatment before and after the use of heat
3.  Always use heat protectant
4.  No more heat styling the rest of the time (i.e. styling by wrapping, roller setting, bantu knots and braids instead of using the flat iron again)

The first time I gave myself heat damage I broke rules #1 and #3.  I thought that I could get away with using heat after a braidout left my hair nice and soft.  I thought, "Wouldn't it be cool if I could just straighten it now without the blowdrying?"  Well, yes and no.  You can use braids to stretch your hair prior to straightening as long as you don't use any oils which can cause damage when you apply direct heat.  I used a mixture of castor, coconut and olive oils to do the braidout so when I applied the heat....sizzzle!  Also, I didn't even bother with heat protectant and ended up with a piece in front that not only did not revert back, but was straight like relaxed hair.  I eventually cut it off which is why I now have bangs.  This was 3 months after I did the big chop.

This time, however, was a huge dissapointment because I KNEW better!  I broke my own rule #4; no more heat the rest of the time I wear it straight.  I moisturized my hair and sealed it with coconut oil everyday so I knew for sure this had something to do with the new damage I noticed.  Not only that, I oiled my scalp with Wild Growth Oil and it ended up coating my strands from root to tip.  I could have used my 
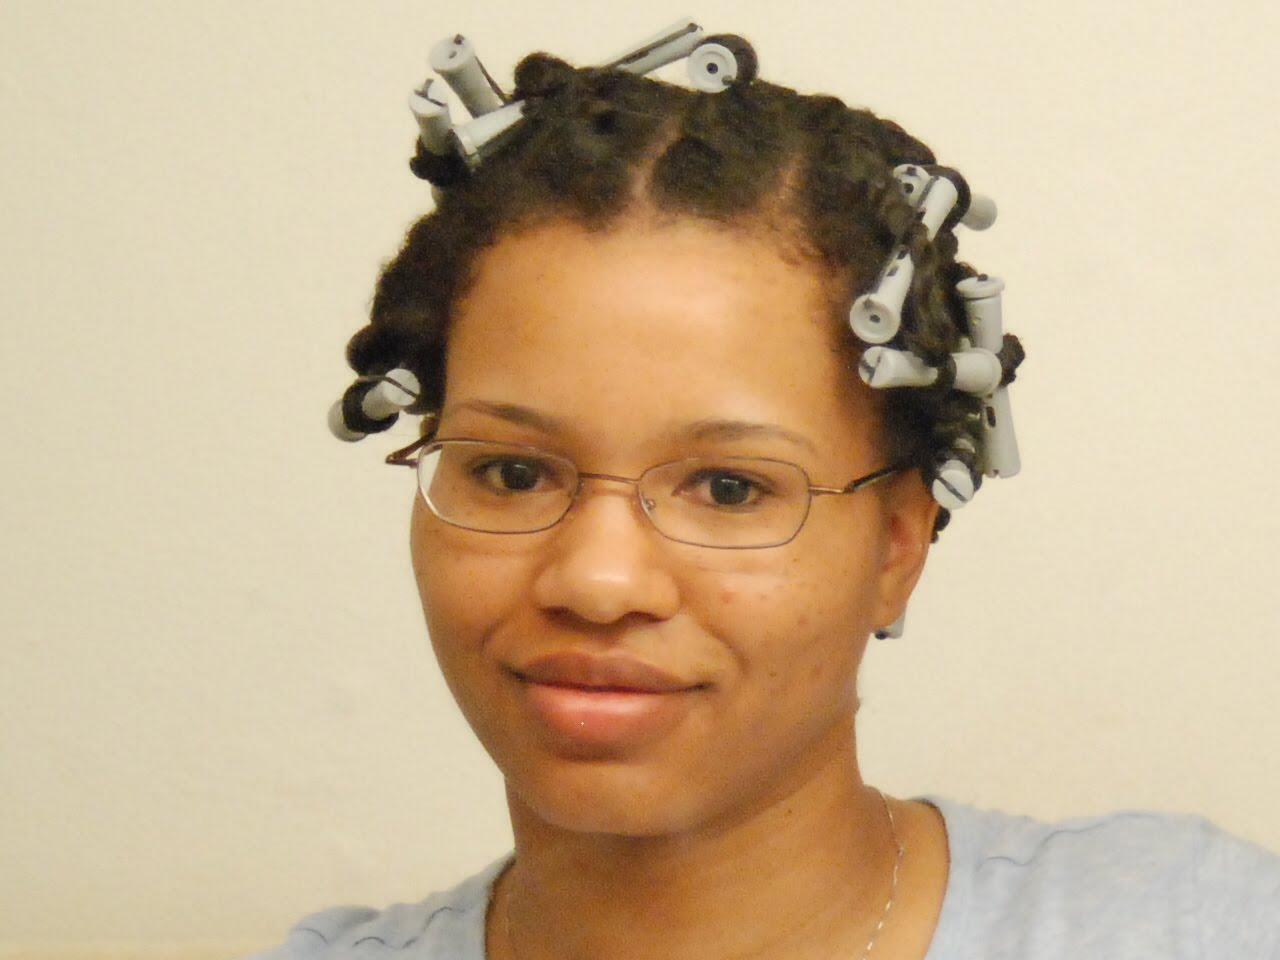
Caruso Rollers, to style my hair but was pressed for time and pulled out the flat iron again.  After shampooing and deep conditioning, my poor hair was a hot mess!  I didn't have curls just a shrunken puff ball (see picture above).  The damage looked like it was pretty serious and I was really scared that I wouldn't see my curls again.

Find out how I got my curls back in my next post "Recovering from Heat Damage"

Recovering from Heat Damage

After my most recent bout with heat damage, I wasn't too sure how to go about getting my curls back.  I wore my hair straight for Easter Sunday but decided to use the flat iron again later in the week after using oils in my hair.  My curls did not revert back like they normally did when I wore my hair straight and I was afraid that the damage was permanent.  Was I upset?  You damn skippy I was!  I couldn't believe that I let this happen again.  Not only that, I just chopped off 1/2" of damage at the start of the year which gave me curls galore.  Now I was right back where I started and worse.

What did I do you ask?  Well, I did what I always do when I need answers, I went to the internet.  I was pretty certain that what I was experiencing was permanent heat damage but I was really hoping that someone out there had a magic remedy.  I stumbled onto a YouTube video that I remembered watching by Taren916, where she used the Aphogee 2 step Protein Treatment to help repair her heat damage.  She showed a before shot where her hair was limp and not so curly and another after the treatment when her hair had more texture. 

After watching that, I went to the hair forums and read articles for more info on how the protein treatment worked.  Basically, heat can cause significant damage to the cuticle layer of the hair strand.  This is the protective outer layer (imagine tiny shingles that overlap one another).  Once these cuticles are damaged, the hair is vulnerable and more prone to dryness and breakage.  The protein in the Aphogee treatment helps to fill in the gaps where the hair strand is missing these important little pieces. 
So, the very next day, I shot over to Sally's and made a B-line for the Aphogee products.  I still wasn't too sure if this was all I needed so I grabbed a silicone based conditioner (the GVP version of Paul Mitchell's The Detangler) and said a prayer.  After the application and rinsing it all out, I was very surprised to see curls where there was once very non-descript strands.  The treatment actually worked, but the curls were still looser than before (as you can see from the photo).  My hair was still much thicker at the roots.  Afterwards, I decided to go back to an old regimen I employed when I used to use semi-permanent color on my natural hair. 

Damaged hair regimen:
  • Deep condition 2x per week- 1x with moisture; 1x with protein
  • Stay away from heat...lol
  • Protective styles to avoid further damage
  • My curls 4 weeks after the treatment.
    Using braids to protect hair from too
    much manipulation
  • Silicone based conditioner for detangling and co-washing
I added the silicone conditioner because the primary reason for using silicone in hair products is so that it can help mask damage incurred by heat styling, hair color and chemical treatments.   Thankfully, my hair is back to being nice and curly but is just a bit more stretched than before with a few lazy curls here and there.  Some people use heat for this effect but that was never my intention.  Needless to say, me and my curls are stepping away from the heat for a good, long while.

Tuesday, May 17, 2011

Enjoying Your TWA (Teeny Weeny Afro)

A wash n' go style with Eco Styler Gel
 at 3 months Natural
Sometimes I find people in hair forums who are trying to figure out what to do with their TWA a.k.a. "Teeny Weeny Afro".  Everytime I see this I think to myself, don't they realize how good they've got it?  When I was new to being natural and my hair was shorter than ever, I embraced it.  It was so much fun!  Now don't get me wrong, it took some getting used to.  However, after a nine month transition, it seemed like my hair wasn't short for very long. 

When I think back on it, all I can remember is how easy it was.  My routine was pretty simple.  Each day I either re-wet my hair with my homemade spritz or co-washed it in the shower with a cheapie conditioner.  I didn't really use a lot of products.  I moisturized my hair with leave-in conditioner, my aloe/glycerin/water spray or shea butter.  I tried a few different hair gels and realized that Eco Styler worked the best for making my curls pop.  Other than that, I played around with finger coils, the conditioner only method, and hair accessories.  This was also the time when I started wearing earings more often which turned out to be a great compliment to my short hair. 

Using a large, snap barrett
for something different
My only piece of advice for anyone who is wondering about caring for their short fro is to consider what season you'll be doing the Big Chop.  Why?  Think about it, the only way to work with your newly natural hair will be when it's wet or damp.  So, doing the BC during the winter months is probably not the way to go unless there's no way around it.  This is precisely why I decided to cut the last of my relaxed ends off in May of 2009.  By the fall, I had enough hair to do braid outs, blow-outs, and individual braids.   Other than that, I think you should enjoy your short and sassy TWA.  It's fun and easy to care for.  Ultimately though, for anyone who is going Natural for the long haul, it is also just the beginning.

Monday, March 21, 2011

Natural Hair Style--The Corkscrew Braidout

I'm finally all finished with my Corkscrew Braidout video. When I blogged about this style a few months ago, I realized that the process may be easier for other naturals to follow if I just illustrated it in a video on my channel. This has become my go-to style for special occasions because I don't have to use any heat to get a fluffy, curly look. The other reason why I wanted to get this tutorial up is because I noticed that there aren't that many videos on natural hair styles that use setting lotion as the main holding product. I never thought to use it for a braidout but it works great while leaving the hair soft and lightweight. I'm just glad to have finally found a braidout method that is pretty much fool proof and delivers every time.


See more of my videos on my channel "mitchellzee" on Youtube.com

Tuesday, October 26, 2010

A Family Affair

My Dad is a licensed barber and has been cutting other people's hair since I was very young. He always did cuts and trims for friends and family. I remember when he used to cut my younger brothers' hair. When they were small he would sit them on top of phone books on a chair in the kitchen.

My mother on the other hand was always very good with braiding hair. She taught me how to french braid my own hair when I was 10 years old. Now that I'm Natural, I'm very grateful for learning this technique.

My younger brother and I took after my dad and learned how to cut hair for our friends. I did it more as a hobby throughout college and to get practice for when I did my own hair. My brother is currently going to school to become a licensed barber. He even participated in a "Barber Cut-Off" earlier this year at a large hairshow in downtown Denver. I am proud to say that he is very skilled at his craft.

Now that I have a family of my own, we do things just like when I was growing up. My husband has long straight hair and my boys have short curly fros. Mine is definitely the thickest of the bunch. Still, I manage to somehow keep up with everyone's individual hair needs. I do all of our trims; curly and straight. My trims are usually once a month. Sometimes I'll even have my mother over for a trim and flat iron. For me, it's just always been this way. When it comes to hair, we like to keep it in the family.

Tuesday, September 7, 2010

Hair Challenges for Length

I am a member of K.I.S.S. (Keep it Simple Sista), a gathering place where ladies (and men) learn more about caring for their hair.  It's a place where you can ask other members for advice and find out what people have done to reach their healthy hair goals.  After lurking through all of the hair challenges, I finally decided to join in on a few.  What is a hair challenge you ask?  From what I gather, it's when a group of ladies (and men in some cases) decide to all do something that will benefit their hair over a set period of time.  At K.I.S.S., everyone is striving for longer, healthier hair and a hair challenge is that extra, little bit of motivation we sometimes need to achieve our goal. 

"Bunning" for Length
I have always had my own goals for where I want my hair to be by the end of year 1, 2, 3 etc.  I keep track of my progress by taking photos each week. I was getting pretty antsy once my hair reached my shoulders.  The dreaded "Shoulder Length" can be hard to get past because the ends of your hair are constantly rubbing against your clothing.  This means wearing it up most of the time or you will be doomed to this length forever...muuaaahahaha.  I love to wear my hair down so this in itself is a challenge for me.

In July, I joined my first hair challenge group called "Shoulder Length to APL (arm pit length) by Dec. 2010".  It was comforting to know that others were in the same boat as me.  It's a place where we can share progress pics and encourage each other.  The second challenge I entered was the one started by K.I.S.S. founder, Traycee, called, "The Bunning Challenge".  All I have to do is wear my hair in a bun or up-do M-F and then I can wear it down on the weekends.  The third and more recent is the, "Ultimate Hair Growth Challenge".  This one is new territory for me.  I realized I only have 3 months until December to reach my goal of APL and I may not reach it unless I up my game.  In this challenge each participant was asked to pick their poison (growth aid) and multivitamin, apply the aid several times per week (vitamins as directed) and voila...hair growth on a whole 'nother level!

My husband teased a little when I told him what I had been up to.  His hair is Mid-Back Length with little to no effort so he didn't see the point of all these "challenges".  I tried to explain that it just helps to know that there is support out there for those of us who need it.  So far, it's actually kinda fun and I'm learning a lot.  For now, I'm just trying not to be impatient for the length that is to come.  All in all, I know it'll be
worth it.

Sunday, August 1, 2010

Transitioning into Natural Hair

Once I finally decided that I was "going natural" and needed to grow out my relaxer, I looked for information on styles that would help with my transition.  The last time I applied relaxer to my hair was in July 2008.  It was now October and my new growth was coming in thick and wavy.  At the time, all I did was wear my hair straight.  This was harder and harder to accomplish the more my natural hair grew.  I looked to the internet and found tons of videos on how to do different styles while transitioning.  I figured why not just start doing my hair as if I were already natural.  That way, I would have some idea of what to do when I cut off the relaxed ends.

Braids with Perm Rods on the ends
Previously, in August '08, I went back to a darker hair color.  With that out of the way, I began focusing on teaching myself how to style my hair without using any heat.  This was all very new for me.  Some styles turned out great and others were complete disasters.  In the months before my "Big Chop", I taught myself how to Flat Twist, Roller set with perm rods and even do my own braid extensions.  Some days I just wore it up in a bun to give my hair a break.  

Now when I look back on my transition, which ended up being for 9 months, I realize that my plan worked.  I use these styles all of the time.  I don't do extenstions anymore, but I enjoy wearing my hair in small individual braids from time to time.  
The "Braid-out" with Satin Scarf Headband

My advice to Transitioners; "Do your hair as if you are already natural,".  Once you decide to go natural, you might as well start your journey and begin using products and techniques that will help you later on.  Not only will you know what to do once you do the Big Chop, but you'll have some idea of how you'll look wearing your
natural hair.

LinkWithin

Related Posts with Thumbnails