Wednesday, December 29, 2010

Dry, Itchy Scalp Woes

I have Psoriasis and always have a rough time with it during the winter months.  It causes dry patches on my skin and flaky, dry scalp.  It can be really embarassing because my kinky, curly hair clings to everything which makes the flakes harder to get rid of.  I was in a minor car accident recently and since I'm having trouble with my back, I thought it would be easier to wear my hair straight.  I figured, I can oil my scalp and keep those flakes under control. 

I tried this theory out and boy was I wrong!  Not only did I see more flaking, but the itching was out of control!  I flat ironed my hair twice this month so that means five days of no washing each time I wore it straight.  I have come to the conclusion that until my scalp issue is under control, I have to wash my hair and scalp more frequently.

Sulfate free Shampoo to remove buildup
and Castor Oil to treat my dry scalp
For the first wash after wearing it straight, I knew I would have to oil my scalp one last time so that I could soften those flakes a bit (gross...I know).  Then I applied coconut oil to my hair to prep it for the shampoo I was about to use.  I washed with Everyday Shea's Moisturizing Shampoo in Lavender which is sulfate free.  Afterwards, I deep conditioned using my new favorite, Tresemme Naturals Conditioner with Aloe and Avocado.  I put on a plastic cap and sat under the dryer for about 30 minutes.  Already I noticed a big difference in how my scalp felt.  After detangling, I dried my hair with a t-shirt, oiled my scalp with Castor oil and applied my leave-ins.  Then, I just wore it pulled back in a simple braided bun.

Today, I co-washed and applied leave-in conditioner.  I used Coconut Oil to seal and then Palmer's Coconut Oil Replenishing Hair Milk to define my curls.  I then did a simple puff and let it air dry. 

I'm going to continue with this process of co-washing each day through the rest of the week and see how it goes.  It's possible that my usual washing twice per week routine is what my hair and scalp likes best.  I can't seem to go more than 3 days without wetting my hair or else major itchies.  Hopefully this works and will get me back on track.  

Wednesday, December 8, 2010

Wintertime Wash n' Go

This time of year is always very harsh on my hair and skin due to the dry climate here in Colorado.  I decided to start doing deep conditioning treatments twice a week for added moisture during the winter months.  The wash n' go style is perfect for this because I'm usually done with the style after two or three days.  Plus, I've been reading and watching how other naturals noticed significant growth while wearing the wash n' go because of the more frequent washing.  I tend to believe that a clean healthy scalp is one contributing factor to this but also the introduction of moisture multiple times per week.  Thing is, it's winter in Colorado!  Leaving the house with wet hair is not happenin' right now.  

Instead of waiting until the spring to rock my curly fro, I looked at a few videos by one of my favorite naturals, anaturalbeauty3.  She's been natural for 2 years and is currently residing in Cali.  Her video on her night time routine illustrates how she puts her curly hair up at night to stretch it out.  I sent her a message asking how she went about reviving the style in the morning.  She replied back that she scrunches her hair with Shea Moistures' Curl Enhancing Smoothie to wake up the curls.  This was a light bulb moment!  Once I realized that there wasn't any need to leave the house with a dripping wet head I was on it. 

The Curl Enhancing Smoothie product is not available locally so I decided to try my Palmers Coconut Oil Replinishing Hair Milk.  I thought it would work because of it's creamy, but wet texture.  I know it plays well with Eco Styler Gel so it was worth a try. 

After a few attempts, I was able to come up with a routine.  The trick is to apply my usual products for my wash n' go in the evening.  Once it has air dried for a couple of hours, I use the diffuser to get my hair completely dry.  This sets my curls before I wrap it up.  Then, just like in the video, I pull my hair back and secure it with a hair tie.  Any short strands can be pinned down.  I then wrap it with a satin scarf and put on my satin bonnet.  In the morning I just take my hair down, scrunch in some product and that's it.  I'm so glad to have found this method because it has resulted in hair that is soft, moisturized and easy to style.

CLICK HERE To See how I do my wash n' go

Sunday, December 5, 2010

Review: Tresemme Naturals Conditioner w/ Aloe Vera and Avocado


Tresemme Naturals Conditioner
in Aloe and Avocado

I'm constantly on the look out for good conditioners that are budget friendly.  Since I co-wash, deep condition and detangle my hair on a weekly basis, I end up going through a lot of conditoner.  Thing is, it also has to be something that my husband feels comfortable using as well.  Let's face it, his hair is way longer than mine and he is just as concerned about his tresses as I am (well maybe not that much).  This rules out anything that will leave him smelling like pina colada when he leaves the house.  We're also picky about the ingredients so, no silicones. 

I was glad to find that Tresemme has a new Naturals line where the conditioners are silicone free.  Now, don't get me wrong, I'm not afraid to use silicones.  I just prefer to co-wash with something that is silicone free for a nice clean rinse that doesn't leave anything behind.  I picked up a 25 oz. bottle of the Tresemme Naturals Aloe Vera and Avocado conditioner for just under $5 USD.  I was surprised to see that it had a thick and creamy texture; not watery.  This has proven to work really well as creamy base for my moisturizing deep conditioning treatments.   It has a mellow citrus scent that doesn't offend (I'm sensitive to scents that are overpowering).  Co-washing with it is similar to using a VO5 Moisture Milks in that I can feel it defining my curls while adding slip to each strand.  I would say that detangling with it is about what you would expect from any conditioner in this price range (i.e. Aussie Moist, Sauve Naturals etc.) 

Overall, I consider this an excellent value for the amount of product you get.  The fact that it doesn't have a bad reaction when I use it as a leave-in under Eco Styler gel has put this on my staples list.  The Naturals line can be found at Target, Walgreens and Walmart.  We are currently workin' on our second bottle of the Aloe and Avocado conditioner.  It's a winner in my opinion and is definitely worth a try.

Friday, December 3, 2010

Rockin' My Fluffy Fro


Early on in my natural hair journey I started trying styles that I could do at night.  I was finally understanding that my hair would thrive if I could just stay away from the flat iron every morning.  Little did I know that there would be a lot of trial and error.  The braid-out style has always kept me guessing because I could never get it quite right.  Either I chose the wrong products, separated the sections too much or it simply wasn't dry in time. 

I've come to realize that every braid-out I do is different depending on so many different factors.  So instead of cringing at the first sign of poof, I'm learning to just go with it.  In the end, the technique is altering my tight, curly fro and stretching my hair.  This helps with tangles and those nasty little single strand knots.  While I am pleased when the style results in lots of definition and curl, I'm also learning to accept the big fluffy look I sometimes
get.  Most importantly, I rock it in public so that others can see that big hair is beautiful and it's here to stay.

Wednesday, December 1, 2010

Braid-out Success with Palmer's Coconut Oil Replenishing Hair Milk

Normally when I do a braid-out I end up with frizzy ends.  I always make sure to be very careful when taking the braids down but it just hasn't been working out.  Another thing that I wrestle with is getting my hair to air dry completely.  I usually spritz my hair with my Aloe Vera juice spray mixture and apply shea butter or some other heavy moisture for hold.  By morning my hair is always damp and we all know what happens if you don't wait until your hair is completely dry...frizzy, puffy hair.  

Now I'm learning to just start out with dry hair and apply moisturizer to set the style.  This is sometimes my current go-to Palmer's Coconut Oil Replenishing Hair Milk, or just plain leave-in conditioner.  I like the Hair Milk because it also helps to reduce frizz and lists shea butter as one of the main ingredients.  I then seal the moisture with one of my favorite oils.  

For my most recent braid-out, I used small satin rollers on the ends.  Only this time I wound the last 2 inches of hair around the roller (like a corkscrew) instead of rolling it up flat like I normally do.  The end result was a fabulous, full style with waves and spiral curls.     

Here are some pics


Most recent with curly ends
My Braid-out before with
straight, frizzy ends


Sunday, November 21, 2010

Countdown to Thanksgiving

I'm making my list and checking it twice.  We're having a few family members over on Thanksgiving which means that I have a lot on my to-do list this week.  I can't forget about my hair though.  In the past I have done curly styles for special occasions like roller sets and twist-outs.  For this Thanksgiving I'm gonna go ahead and wear it straight.  I've been participating in a couple of Growth Challenges with the ladies at K.I.S.S. and can finally take this opportunity to check my progress. 

This month I also started doing deep conditioning treatments twice a week.  This is another challenge that was started last year or the year before.   Someone on K.I.S.S. decided to get it going again.  Basically, I'm doing it for the extra moisture my hair needs during the winter months.  This week though, since I'm going to use heat on my hair, I'm probably going to make sure and do something with protein.  I have the Aphogee 2 Minute Reconstructor which works good but the ingredients include Mineral oil and silicones.  While I'm out buying my turkey and veggies for Thursday, I may just pick up the GPB conditioner by Aubrey Organics.  I have always liked their Honeysuckle Rose conditioner for when I need moisture so I'm pretty confident that this one will work for me as well.  Either way, I always like to prepare my hair with a deep treatment so that I won't end up damaging my curls when using heat.  Hopefully I can find the time for all the cooking and cleaning and still get dinner done on time.  Wish me luck!

Getting Ready for the Craft Show


Our Lavender in the Summer
My Husband is a Master Gardener and loves to grow herbs.  Our garden produces a large bounty of fresh, culinary herbs each year.  The last couple of years we have been harvesting the herbs and crafting with them.  One of my Husband's favorites is the lavender.  After drying it, he adds it to sugar and blends the mixture together with vanilla beans to make a Lavender Vanilla Sugar.  Yes, it's as good as it sounds.  The lavender we grow is so strong that when he sits down to separate it for storage, our whole house is heavy with the scent. 

Strawberry Mint Vinegar

He also learned how to make flavored vinegars and combines flavors like strawberry with mint or bluberry and sage.  All of the herbs are grown right here using organic methods.  The fruit is selected during the height of their season which gives the best flavor.  I found that the vinegar is always really good with meat when I'm in a hurry and don't have time to marinate it.  The sugar is really yummy in a warm cup of tea because the heat makes the lavender flavor bloom in your mouth...heavenly. 


For the craft show I made up new labels for the vinegars and helped him get everything ready.  I found some purple ribbon for the sugar jars which turned out really pretty.  I even typed up little cards giving suggestions on how to use the sugar and vinegars.  These items will be ready for sale in a few days in our Etsy Store, "Mimis Craft Pantry".  Here are some pictures of everything as I was getting it all ready. 
Color Coded Labels-Designed by moi :)
Lavender Vanilla Sugar

Getting Everything Ready


Friday, November 19, 2010

Choosing a Ceramic Flat Iron

My FHI Ceramic Flat Iron
When my first flat iron quit working after only one year of use, I decided that I would definitely look into buying something of better quality the next go 'round.  Little did I know that it would be 7 months before I would finally purchase a new one.  Instead of running out and replacing it right away, I decided to take my time and do some research.  One of the first things I did was start looking into styling options that didn't require the use of heat.  This started me on my Natural Hair journey which meant that the flat iron of my dreams would have to be able to straighten my natural hair texture, kinks and all.

I looked at Consumer Reports on the subject and found tons of info on the different types of flat irons.  There are a lot of heat styling tools that are ceramic now but the real question is, how ceramic are they?  It turns out that my previous joke of a flat iron was only ceramic coated which would explain the $40 USD price tag.  The material started peeling and would catch my hair.  This exposed the metal plates underneath and caused lots of breakage.  However, professional tools that used full ceramic plates were priced way more than I could afford and were very fragile.  One drop and crack goes the flat iron.  I later read that the mid-range variety ($80-$150) used plates that have multiple layers of ceramic coating and sometimes even added tourmaline. 


 It is the tourmaline that helps the iron produce more negative ions.  No, this is not chemistry class folks, we're talkin' hair here!  Apparently the more negative ions the better the heat.  Of course, using direct heat on the hair is never considered a good thing but I found out that there are different types of heat.  This information explained how some flat irons give excellent results and also cause less damage while others burn the hair to a crisp.

Of all the brands out there I finally narrowed it down to the FHI Technique G2.  I found the pink version on sale at Ulta for $79 but still see it at Target for ten dollars more.  It definitely puts my old iron to shame but the sucker gets hot so I have to be extremely careful with it.  I like that it has a beveled edge which makes it really easy to do flips and curls.  If I could do it all over again I would hold out for the FHI Platform which has a dial so you can adjust the heat setting.  Maybe one day...a girl can dream, right?  

**Check out this article for more info on choosing a quality Flat Iron**

Friday, November 12, 2010

Eco Styler Wash n' Go Trials

A few months ago I learned more about Aloe Vera and how it can help restore the natural pH balance of my hair.  This had me wondering what would happen if I added Aloe Vera juice to one of my staple products Eco Styler gel

I've been using this gel for my wash n' go styles and whenever I need to slick down my edges.  However, if I forget to apply enough moisturizing products underneath it, my hair ends up a little on the crunchy side.  So, I figured why not add aloe vera and see if that makes a difference since it will help bring the pH of the gel down (hopefully).  I don't have pH tester strips yet so I can't verify what pH I ended up with but the results were good.  The product, as always, helped define my curls.  Upon drying though; dry crunchy hair.  What gives?! 


I've been learning in the past few months that it's not just the pH that is important but also the ingredients.  This little experiment made me realize that it may be the glycerin in the product that always gives me the "Ramen Noodle effect" which is why I always need use oil and conditioner underneath.  Also, living in a dry climate where there is no humidity present can also add to the drying (not moisturizing) effect of the glycerin.  For now, I'm avoiding the Eco Styler or using it sparingly until I can figure out the combination that works for me.


Before applying the aloe/gel mix

My hair with Aloe/ Gel mixture
applied to one section

Aloe Vera for pH Balance--Spray Leave-in Recipe

After watching KimmayTube's videos on pH Balance, I realized the reason why Aloe Vera juice or gel has always been such a huge part of my regimen.  When I did my Big Chop in May of 2009, it was one of the first things I used on my hair and my family has been using it ever since.  It wasn't until I watched the videos that I actually knew how it worked.  Basically our hair's natural pH is a 4 or 4.5 on the chart which is the same value given for Aloe Vera juice or gel (different brands may vary).  Things like conditioner, shampoo and even water have a pH of 6 or 7.  This change in pH balance opens up the cuticles along the hair shaft which can result in frizzy, puffy hair.  Using the Aloe Vera is a way to bring the hair back to its' proper pH making it easier to detangle and style. 

KimmayTube is also known for her Leave-in conditioner recipe which incorporate's Aloe Vera juice as the balancing ingredient.  I've tried it and liked the results.  For me and my family though I prefer a spray leave-in that can be used daily.  For this I use the following:

Aloe Vera Spray Leave-In

1 part Aloe Vera Gel or Juice (Lily of the Desert brand)
1 part Water
5-6 drops Rosemary essential oil (natural preservative)
1 to 2 squirts Giovanni Direct Leave-In

Combine ingredients in a spray bottle and shake vigorously until conditioner dissolves.  The conditioner will continue to dissolve over the next few hours.  Use as a moisturizing leave-in or re-wetting spray.

Some of the ways I use it:

  • Set my braidouts/twistouts
  • re-wet my kids' curly hair before combing
  • detangling my husband's long hair
  • re-wetting/moisturizing my wash n' go 

Most recently I found that it works when re-activating the Kinky Curly Curling Custard on my son's hair for great 2nd day hair with the product.  I like this mix because we're getting the benefit of the Aloe and Conditioner in one easy to use spray. 

*Be sure to stop by KimmayTube's channel on YouTube to find out more about the structure of hair.

Saturday, November 6, 2010

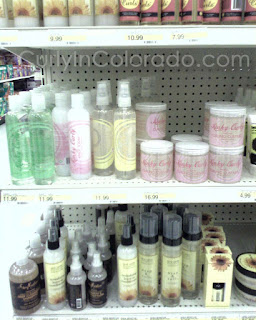
Curly Hair Products Now at Target Stores


Miss Jessie's Products
Now available at Target Stores

I was at my local Super Target picking up a few things when I found Kinky Curly, Miss Jessie's, Jane Carter Solution and Shea Moisture products on the shelves.  I honestly just stood there staring at the display in disbelief.  Girls with curls in other cities have had access to these products at their Target stores for a while.  This was not the case where I'm at.  I even looked it up online and the only place where you could find Kinky Curly products was at Whole Foods which is a little bit of a drive for me.  The Miss Jessie's was only available online which, combined with shipping**, made the cost an obstacle (actually, the price is still an obstacle but that's another post...lol!).  


Kinky Curly and Jane Carter Solutions
Natural Products for Kinky and Curly hair
now at Target Stores
I was already thinking about trying the Kinky Curly Curling Custard.  Supposedly it gives curl definition while keeping the hair soft and moisturized.  I hope this will work for my son who wants to wear his hair longer now.  The Tightly Curly Method  just isn't taming his curls the way it used to.  His hair is frizzy by the time he gets home from school.  I really don't want to get into using frizz serums and hair gel with his soft curly hair.  On top of that, my hair has been acting funny whenever I use my staple Eco Styler gel.  I use olive oil and leave-in conditioner under it but I still end up with crunchy hair that is dry by weeks' end.

With all that,  I still couldn't justify the price (and the drive) for the Kinky Curly.  At $32.00 USD for 1 large 16 oz. container of KCCC, I've been on the fence for quite some time.  However, Target has the smaller 8 oz. jars in stock for only $16 so I thought, why not give it a try?  I did a roller set last night so I won't be able to try it out for a couple of days.  Stay tuned for my upcoming Kinky Curly trials!

**FYI--Ground Shipping is now free for anyone who does not have Miss Jessie's in their local Target stores--see website for details**

Friday, October 29, 2010

Crochet on the Brain


My "Rasta" Slouchy Beret

I want a hat that is large enough to cover up my braids when I'm trying to do a braid-out. For some reason my hair is never dry by morning when I'm taking the kids to school. Then, when I wear my hair out, the hats that I see at the store are just not big enough for my hair...lol! So, I've decided to make my own. That way I can make it as big as I need to.

Which brings us to the slouchy beret that I've been working on since early September.  I found the beret crochet pattern on YouTube (my second home).  It was posted by Bethintx1 in four seperate videos where she takes you through it step by step.  The color I used (Limelight) is not really something I would wear out but the hat turned out kinda cute anyway.  I did a couple more increase rows to make a "Rasta" style hat.  I'm gonna start the pattern again (the first try was for experimentation) and make a few variations this time. 

Back View
used double
crochet throughout


The yarn I'm using is called, "I Love this Yarn," and is available at Hobby Lobby for about $3.50 (USD) per skein.  I like that it's acrylic for easy washing and is super soft which makes it nice to work with.  It's not only perfect for my budget but it comes in so many fabulous colors.  My second beret is going to be done in the color "Ivory" which will be a fun look for the winter months. 
 

Wednesday, October 27, 2010

The Satin Braid-Out

I joined yet another group over at the K.I.S.S. network. This time it's a group where we will be doing "Satin Braid-Outs" and sharing info on how to perfect the look. I watched a video on YouTube by NinaPruitt where she demonstrates how to do it. I used a long satin scarf that I thought would work and cut it into 4 strips. I cut it using pinking shears because I didn't want the fabric to fray. My hair was freshly washed and conditioned so I applied the KimmayTube Leave-in where I substituted Giovanni Direct Leave-In for my creamy base and coconut oil instead of jojoba oil. Then I sealed in the moisture with my castor, coconut and olive oil mixture.

The braiding wasn't as tricky as I expected. It was just like adding extension hair to a braid except you're using a piece of satin fabric. My strips were not quite long enough though so tyeing the ends was a little awkward. The next morning, my hair was very defined but, the strips did leave small pieces of frayed fabric in my hair. I did not enjoy picking those out of my hair all day. Also, my hair was still damp which I knew would lead to crazy, frizzy hair so I put it up into a protective style.
So it's back to the drawing board on this one. I'll have to check back with my group and find out what other ladies are doing for this style. I really hope to get the braid-out down because I know it will come in handy later on.

Tuesday, October 26, 2010

A Family Affair

My Dad is a licensed barber and has been cutting other people's hair since I was very young. He always did cuts and trims for friends and family. I remember when he used to cut my younger brothers' hair. When they were small he would sit them on top of phone books on a chair in the kitchen.

My mother on the other hand was always very good with braiding hair. She taught me how to french braid my own hair when I was 10 years old. Now that I'm Natural, I'm very grateful for learning this technique.

My younger brother and I took after my dad and learned how to cut hair for our friends. I did it more as a hobby throughout college and to get practice for when I did my own hair. My brother is currently going to school to become a licensed barber. He even participated in a "Barber Cut-Off" earlier this year at a large hairshow in downtown Denver. I am proud to say that he is very skilled at his craft.

Now that I have a family of my own, we do things just like when I was growing up. My husband has long straight hair and my boys have short curly fros. Mine is definitely the thickest of the bunch. Still, I manage to somehow keep up with everyone's individual hair needs. I do all of our trims; curly and straight. My trims are usually once a month. Sometimes I'll even have my mother over for a trim and flat iron. For me, it's just always been this way. When it comes to hair, we like to keep it in the family.

Saturday, October 9, 2010

Reshma Henna Review

I recently found Reshma Henna at a local Indian grocery store. After hearing about it online, I thought I would try it out. For 200 grams the cost was only three dollars. I figured if it worked I was definitely going back to buy more. Well, it not only worked, it also rinsed out a lot easier than the henna I used in the past.

I combined 100 grams Reshma Henna with about 50 grams Amla powder which is a great conditioner. I also had a little Moroccan Henna leftover from my Hennasooq.com order so I figured I would use the rest. The resulting color definitely covered my stubborn greys but was still very burgundy red. Indoors it still looks dark but you can really see the red tone in the sun. I was hoping for a different result because amla is known for darkening but, oh well.


On other occasions I combined Indigo with my Henna for a brunette color. Somehow I was still ending up with a more reddish auburn. I may end up going black by applying the Indigo to my hair after I've rinsed the henna. I've heard that this 2 step process will also give the best gray coverage. Either that or I'll give the henna/indigo mix one more go but this time using more indigo.

Wednesday, October 6, 2010

Braiding My Own Hair

When I was researching what styles would work best for my transition into Natural hair, I found that wearing braids would be a good choice. Here's the thing...the last time I had my hair in braids was when I was 10 years old. My mother used to braid my hair 1 to 2 times each week. I had never gone to a stylist to have it braided.

I had heard all of the horror stories of people getting their braids done and it hurting so bad the first couple of days. Then there was the cost. I was not interested in spending tons of money to have someone else do them for me. I learned about the "Crown and Glory Technique" at Growafrohairlong.com. There were lots of women who were using this method to grow their hair by wearing it in braids a couple months at a time. Here's the kicker, they were all braiding their own hair with professional results in most cases.


I found a twenty minute video on the site that explained how to do braid extensions yourself. I was amazed to see how easy it was (or at least in the video). It showed everything from how to select the hair to how to finish the ends. The tutorial took all of the mystery out of doing extensions. So, I watched the video a few times and headed to my local bss. I was so confident that I didn't even ask for help from a salesperson.

When I got home, I started prepping the hair, carefully following the instructions in the video. Once the hair was ready I got started on my first few braids. Thank goodness I started in the back. I quickly found out that it would take a bit of practice but I finally got the hang of it. I probably worked for 5 hours that night and then another 3 the next morning (after taking my son to school with an Axel Rose scarf on my head..lol!). When I finished, I was so proud of my hair (and I did it for under $30 bucks!).

Thing is...after two months, I just couldn't take those braids. It was the worst feeling not being able to see my hair. Also, since it was my first time, I was constantly having to re-braid sections after each wash. Sadly, I haven't done them since. Now, when I want a braided style, I just work with my own natural hair which is a lot less work. I still use some of what I learned in the video. I get asked by my subscribers on YouTube how I manage to get them to look so neat in back. I just say, "It's easier than you think," and direct them to the site.

Sunday, October 3, 2010

New Multivitamin for Hair Growth

I joined the "Ultimate Hair Growth Challenge," on K.I.S.S. at the end of August.  It lasts for 6 months and only requires two things:

1.  Use a growth aid 2-5 times per week
2.  Take a multivitamin every day

At the beginning of the challenge, I was on the tail end of a bottle of Women's One a Day vitamins.  I can't say too much about them as far as hair growth because I didn't notice any difference while using them.  I also kept having an upset stomach whenever I took them.  The hair challenge gave me a good enough excuse to start looking for
something new. 

I wanted a vitamin that would give me the minerals I need along with some natural elements.  So I headed to one of my favorite Natural Grocery stores called Vitamin Cottage where I often shop for supplements and natural hair care products.  The prices are reasonable and they have a pretty good selection.  I settled on the Women's One Food Based Multivitamin by Rainbow Light.  It is gentler on my stomach (as the bottle states) and is made with things like kale and spinach juice, organic spirulina, probiotics and enzymes.  So far, I prefer it over my old vitamin because with it being easier to take, I'm keeping up with it better.  I can almost swear that my nails are growing faster so that tells me it may a good choice for my hair growth challenge.  My first length check is at the end of October so we'll see how it goes.

Thursday, September 23, 2010

Easy Cheesecake Recipe


For our 10 year Wedding Anniversary, the hubby asked if I would make a cheesecake for dessert.  I thought, "Why not...It's been a while since I've made cheesecake".  Normally I just use the recipe on the back of the graham cracker box but, the one I picked up didn't have one.  So, I searched for a recipe online the night before the big day.  It was too late to head out for any last minute ingredients.  After reading a few recipes, I figured out that I could probably pull something together using what I had on hand. 

The results...an easy cheesecake recipe that was good to the last slice.  Try it and you won't be dissapointed.

Natural Style-Flat Twist-Out


While I was transitioning, I learned how to flat twist my hair by watching videos on YouTube.  At first, the technique eluded me and it seemed like I could never get the twists right.  I was always starting each one over and over.  I kept at it and now it is one of my favorite styles.  The only thing I haven't quite figured out is how to get them to dry faster. 

This weekend I decided to do some flat twisting once again for a soft wavy look.  One thing I figured out is that if I twist in rows from the crown and go back towards my nape, I end up with pretty little spirals that fall down around my face. 

Another tip I picked up over at CurlyNikki.com is to secure each flat twist with a bobby pin so that it doesn't unravel.  Sometimes I use rollers on the ends for a Twist n' Curl or just leave the ends out for a faster drying time.  

Tuesday, September 7, 2010

Hair Challenges for Length

I am a member of K.I.S.S. (Keep it Simple Sista), a gathering place where ladies (and men) learn more about caring for their hair.  It's a place where you can ask other members for advice and find out what people have done to reach their healthy hair goals.  After lurking through all of the hair challenges, I finally decided to join in on a few.  What is a hair challenge you ask?  From what I gather, it's when a group of ladies (and men in some cases) decide to all do something that will benefit their hair over a set period of time.  At K.I.S.S., everyone is striving for longer, healthier hair and a hair challenge is that extra, little bit of motivation we sometimes need to achieve our goal. 

"Bunning" for Length
I have always had my own goals for where I want my hair to be by the end of year 1, 2, 3 etc.  I keep track of my progress by taking photos each week. I was getting pretty antsy once my hair reached my shoulders.  The dreaded "Shoulder Length" can be hard to get past because the ends of your hair are constantly rubbing against your clothing.  This means wearing it up most of the time or you will be doomed to this length forever...muuaaahahaha.  I love to wear my hair down so this in itself is a challenge for me.

In July, I joined my first hair challenge group called "Shoulder Length to APL (arm pit length) by Dec. 2010".  It was comforting to know that others were in the same boat as me.  It's a place where we can share progress pics and encourage each other.  The second challenge I entered was the one started by K.I.S.S. founder, Traycee, called, "The Bunning Challenge".  All I have to do is wear my hair in a bun or up-do M-F and then I can wear it down on the weekends.  The third and more recent is the, "Ultimate Hair Growth Challenge".  This one is new territory for me.  I realized I only have 3 months until December to reach my goal of APL and I may not reach it unless I up my game.  In this challenge each participant was asked to pick their poison (growth aid) and multivitamin, apply the aid several times per week (vitamins as directed) and voila...hair growth on a whole 'nother level!

My husband teased a little when I told him what I had been up to.  His hair is Mid-Back Length with little to no effort so he didn't see the point of all these "challenges".  I tried to explain that it just helps to know that there is support out there for those of us who need it.  So far, it's actually kinda fun and I'm learning a lot.  For now, I'm just trying not to be impatient for the length that is to come.  All in all, I know it'll be
worth it.

Sunday, September 5, 2010

Indian Store Haul...Henna and Amla


I started using Henna at the beginning of the year and immediately noticed its' benefits. Unfortunately, I wasn't too sure about the brand I used so I later found out that it possibly had sand in it as a filler. This is sometimes the case when buying from a local store because manufacturers have been known to add things to packaged Henna.


Henna, Amla Powder and Amla Oil
from Ananda Bazaar in South Aurora
Since then I've been ordering all of my Henna online to make sure I'm getting quality, 100% pure henna to dye my hair. This can be costly though so, I have been
 determined to find it locally to save on shipping. I kept checking out different stores and finding mostly groceries and dvd's.

Today I decided to head back to the Ananda Bazaar in Aurora where I found the Henna I used on my first application. I was amazed to find that the shopkeeper is now selling the Henna brands I have been hearing everyone rave about. We're talkin' Reshma, Jamila and Hesh varieties. He also now carries Neem oil, Shikaki, Amla powder and Dabur's Amla oil. For about $16, I left out of there with 5 boxes of product (less than half of what I would pay online). I wanted to by more but at least now I know where to go when I need my Henna fix..lol.

After opening the henna boxes I was happy to see henna of a fine, powdery consistency without all of the additives I found in that first package. The Amla is to help darken the color so that the henna won't be so red. I've also heard that it will keep the henna from loosening my curl pattern. It is already looser than before so I don't want to lose my curls completely. Now I can't wait to do my next application so I can cover up these stubborn grey hairs!

Thursday, August 12, 2010

YouTube is a Natural Girls Best Friend

I'm a YouTube fanatic!  I love it so much I even started making my own videos.  Before I decided to go natural, I discovered tons of videos where ladies would explain what they did for longer, healthier hair.  When I noticed how damaged my own hair was, I turned to the internet for an answer.  All of these videos kept popping up.  Some were about the best flat iron to use, while others showcased hair styles that required little to no heat.

Not knowing where to begin, I used the YouTube search bar to locate videos on growing african american hair longer.  I found a video by Saleemah Cartwright, founder of  Hydratherma Naturals.  It was a picture slideshow of her hair from completely shaved to length down her back! I later found MacherieHair's video (no longer posted)on how she does a silk wrap after doing a rollerset for straight and bouncy hair.  This one was a shocker!  In the beginning her hair is completely wrapped in saran wrap.  Then she starts to comb it out...whooaa!  Her hair was long, healthy and full of body.  So that was all it took...I was completely hooked. The videos about growing healthy hair led me to where I am today.

My Favorite Transitioning Style

Once I decided to go Natural, I considered how long I should go before doing the Big Chop.  At only 3 months post relaxer, I was certain that I wanted to grow my natural texture out a lot more before this step.  Normally I wore my hair straight but I was beginning to see how damaging all of the heat was.  The next best thing was Rollersetting. 

My Hood Dryer
I personally had never Rollerset my hair before.  I had seen it done in the salon but that was about it.  From what I could see on YouTube, there were a lot of ladies who did it each week instead of using flatirons and blowdryers.  I also kept hearing about how handy it was to have a hooded dryer at home for this style and to do deep treatments.  I figured I would give it a go.

I went to my local Sally's beauty supply and purchased the Ion hooded dryer with multiple heat settings for about $40.  When I got home, my husband thought I had gone mad.  I explained that it was an investment and that I would get a lot of use out of it. 

My Curly Fro
As for the rollersetting, I really didn't know how it would turn out but it was worth a try.  I watched plenty of videos before going for it.  I used the small grey perm rods so that the two textures of my hair would blend together better.  The end result was a cute and curly little afro.  The style often lasted  a whole week which meant less stress on my hair.

It's almost 2 years later and I still rollerset my hair.  I didn't realize it then but it's a technique that can also be used on Natural hair.  I'm glad that I learned how to do it during my transitioning phase because now it's one of my staple styles.

Sunday, August 1, 2010

Transitioning into Natural Hair

Once I finally decided that I was "going natural" and needed to grow out my relaxer, I looked for information on styles that would help with my transition.  The last time I applied relaxer to my hair was in July 2008.  It was now October and my new growth was coming in thick and wavy.  At the time, all I did was wear my hair straight.  This was harder and harder to accomplish the more my natural hair grew.  I looked to the internet and found tons of videos on how to do different styles while transitioning.  I figured why not just start doing my hair as if I were already natural.  That way, I would have some idea of what to do when I cut off the relaxed ends.

Braids with Perm Rods on the ends
Previously, in August '08, I went back to a darker hair color.  With that out of the way, I began focusing on teaching myself how to style my hair without using any heat.  This was all very new for me.  Some styles turned out great and others were complete disasters.  In the months before my "Big Chop", I taught myself how to Flat Twist, Roller set with perm rods and even do my own braid extensions.  Some days I just wore it up in a bun to give my hair a break.  

Now when I look back on my transition, which ended up being for 9 months, I realize that my plan worked.  I use these styles all of the time.  I don't do extenstions anymore, but I enjoy wearing my hair in small individual braids from time to time.  
The "Braid-out" with Satin Scarf Headband

My advice to Transitioners; "Do your hair as if you are already natural,".  Once you decide to go natural, you might as well start your journey and begin using products and techniques that will help you later on.  Not only will you know what to do once you do the Big Chop, but you'll have some idea of how you'll look wearing your
natural hair.

Friday, July 23, 2010

What finally made me decide to go Natural

My hair in Aug. '08
After using a relaxer to straighten my hair for 20 years, there I was trying to decide if I should go Natural.  For me this would mean "re-learning" how to do my hair.  The last time my hair was Natural, my mother was still doing it for me.  I even called to ask her about my hair texture back then.  It wasn't so thick and crazy that she didn't know what to do with it.  I also remembered how long it was. 

Then it was like a light finally went on...my hair was long back then.  I also thought that it was pretty sad that I couldn't even remember what my own hair texture was before the relaxer.  So, that was it, I had my mind set on growing out my relaxed hair.  I figured, I spent twenty years wearing it straight, so why not spend the next twenty natural?

Of course I had to talk it over with my husband.  He and I have known each other since High School and this would be new for both of us.  For weeks I kept asking him if he was okay with it.  Finally he just said, "I didn't marry you for your hair!"  He was behind me 100 percent.  Even now, when I look at how fast it's growing, he keeps saying how he knew all along that it would be healthier if I just quit putting all that harsh stuff in my hair. 

My hair in May 2010
So there you have it.  The last time I used a relaxer was in July of 2008 but I didn't actually decide to go natural until October of the same year.  I waited until May of 2009 to chop off the relaxed ends. 

To watch my video on how I did it, check out my YouTube channel, mitchellzee


LinkWithin

Related Posts with Thumbnails